Saturday, June 20, 2026
Home Blog Page 30

Native Landscaping Ideas Around Houston Pools

0

Native landscaping isn’t just a design trend, it’s a climate-smart strategy that enhances sustainability, simplifies maintenance, and supports local biodiversity. For homeowners with pools in the Houston area, integrating native plants into your poolside design means lower water bills, fewer chemicals, and year-round visual interest.

If you’re designing or upgrading your pool area, here’s how to align beauty with function by using native landscaping around Houston pools.


Why Native Plants Work Best Around Pools

Houston’s subtropical climate brings hot, humid summers and mild winters. Native plants are already adapted to these conditions. They can handle periodic drought, heavy rains, poor soils, and, most importantly for pool owners, chemical splashes from chlorine or saltwater systems.

Incorporating these plants into your landscape also reduces the need for fertilizers and pesticides, which helps protect local waterways from runoff.


Low-Maintenance Native Plants to Frame Your Pool

1. Gulf Coast Muhly (Muhlenbergia capillaris)

This ornamental grass thrives in full sun and poor soil, with vibrant pink-purple plumes in fall. Its fine texture adds softness around concrete hardscaping or pool decks.

2. Turk’s Cap (Malvaviscus arboreus var. drummondii)

A native shrub with bright red blooms that attract hummingbirds, Turk’s Cap tolerates shade or sun and recovers quickly after being cut back.

3. Texas Frogfruit (Phyla nodiflora)

Ideal as a native ground cover, this creeping perennial can replace traditional turf near pool edges. It’s barefoot-friendly and supports pollinators.

4. Inland Sea Oats (Chasmanthium latifolium)

For a shaded poolside corner, this grass-like plant delivers waving seed heads and soil erosion control.

5. Black-Eyed Susan (Rudbeckia hirta)

For bursts of yellow throughout the summer, this flower thrives in full sun and is deer-resistant, ideal for open poolscapes without fencing.


Designing for Function and Aesthetics

Buffer Zones

Create buffer zones between your pool and planting beds. Gravel, flagstone, or river rock borders absorb splashes and reduce debris in your pool.

Raised Planters

Use raised beds or decorative concrete containers for native herbs and flowering plants. They protect root systems from waterlogging while creating visual height variation.

Privacy Screens

Instead of fencing, consider native evergreens like Yaupon Holly or Wax Myrtle as living privacy screens. These provide natural windbreaks and year-round coverage.

Shade Trees

Avoid messy or brittle trees like pecan or sycamore. Instead, opt for native trees like Eastern Redbud or Mexican Plum, which offer seasonal color without overwhelming leaf drop.


Poolside Microclimate Considerations

Paved areas around pools can reflect intense heat. Use mulch, shade structures, or pergolas planted with Coral Honeysuckle to cool the space. Native vines can help reduce the surface temperature while adding lush beauty.

Also, avoid over-irrigating. Houston’s clay soils retain moisture, so choosing drought-tolerant natives keeps your irrigation needs minimal. Overwatering can also introduce standing water near pool decks, increasing maintenance needs.


Eco-Friendly Pool Upgrades to Pair With Landscaping

Smart landscaping around your pool is just one side of sustainability. Consider combining native planting with other eco-conscious upgrades:

Install a variable-speed pump to reduce energy consumption.

Use solar pool covers to retain heat and reduce evaporation.

Switch to saltwater systems or UV filtration to minimize chemical use.

Work with licensed professionals like Cabana Pools Aquatech

 who can guide both pool design and landscaping integration.


What to Avoid in Poolside Landscaping

Invasive species like Nandina or Ligustrum, which outcompete natives and harm pollinators.

Mulches that float such as pine bark, which end up in the pool after storms.

Thorny or allergenic plants like agave or ragweed, which reduce poolside enjoyment.


FAQs

Can native plants survive pool splash from chlorinated water?

Yes, many Houston-native species such as Gulf Coast Muhly and Yaupon Holly tolerate occasional chlorine exposure, especially if not directly irrigated with pool water.

Do native plants attract pests around the pool?

Native plants attract pollinators, but most don’t harbor aggressive pests. Avoid dense, unmanaged shrubbery near pool decks, which can harbor insects.

How do I transition from traditional landscaping to native landscaping?

Start by replacing a few non-native plants with region-specific natives each season. Group plants by sun and water needs, and consult professionals familiar with native design.

Will a native landscape look too wild or unkempt?

Not if designed with structure. Use hardscaping, borders, and mass plantings to create order and symmetry. Raised beds and repetition of species enhance curb appeal.


Conclusion

For Houston pool owners looking to reduce water use, improve biodiversity, and elevate the beauty of their backyard, native landscaping is a natural choice. It simplifies maintenance, supports wildlife, and reinforces long-term sustainability, without sacrificing aesthetics.

For those ready to take the next step, consult experienced professionals like Cabana Pools Aquatech, who understand the synergy between pool design and native Houston ecology.

Motor Development Milestones Inspire Joyful Growth

0

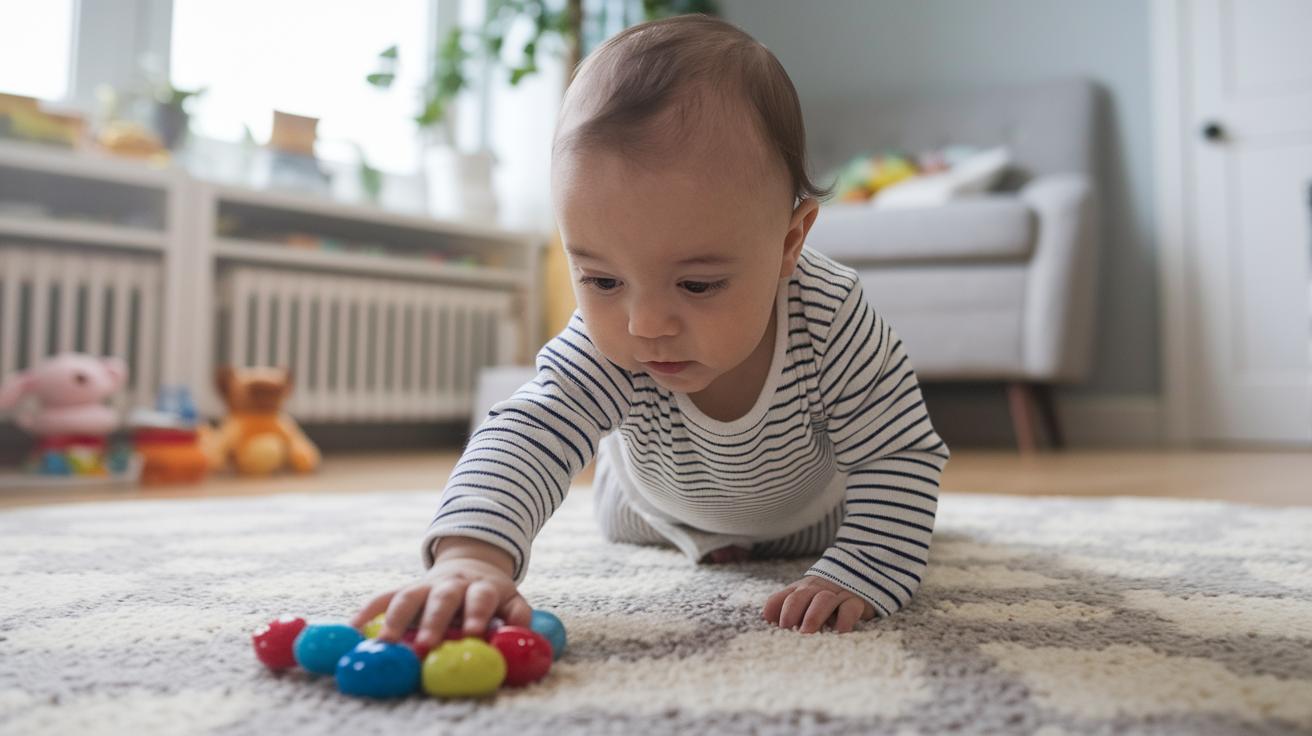
Have you ever noticed how your baby’s first grab on a toy is a big sign of growing up? It’s like a tiny cheer of progress, showing that they are ready to explore more of the world. When your little one reaches out or picks up their favorite toy, they’re practicing important skills that lead to even more adventures. Every small move is a moment to celebrate the joys of learning and life. So, join us as we watch these precious milestones bloom into everyday joy.

Motor Development Milestones Inspire Joyful Growth

img-1.jpg

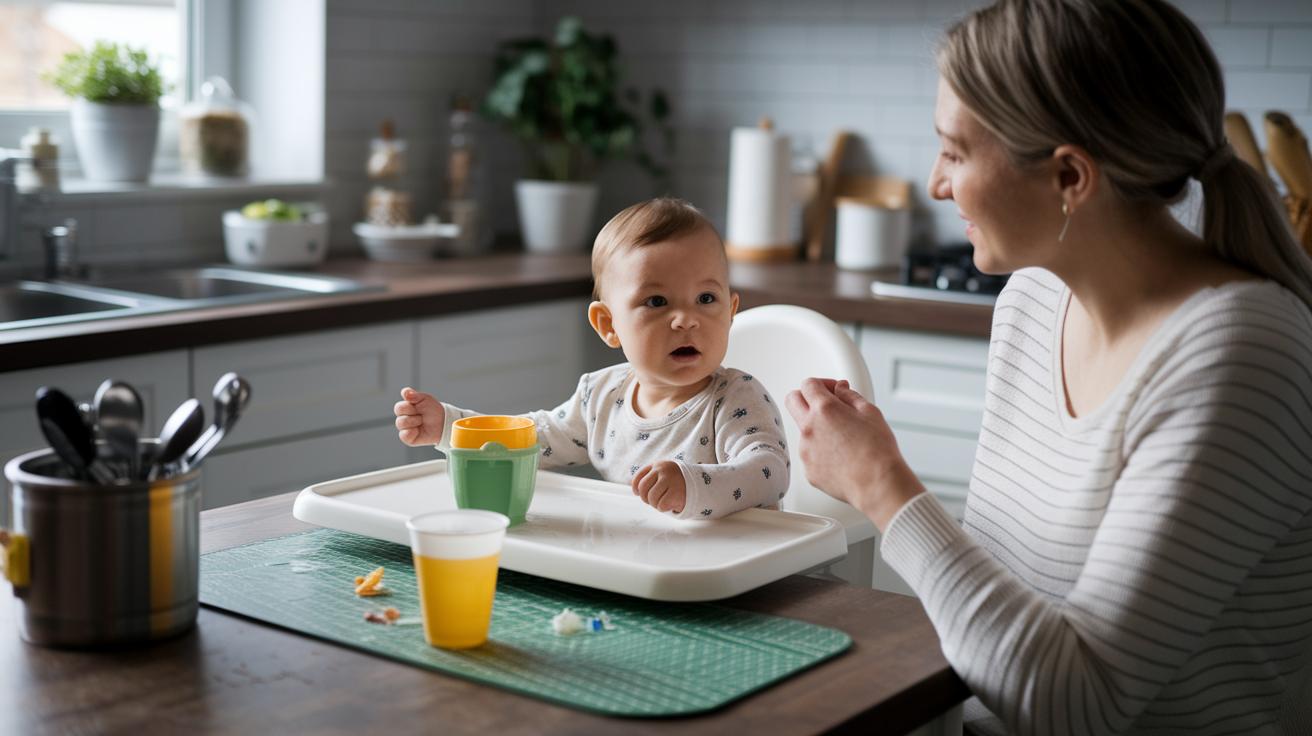
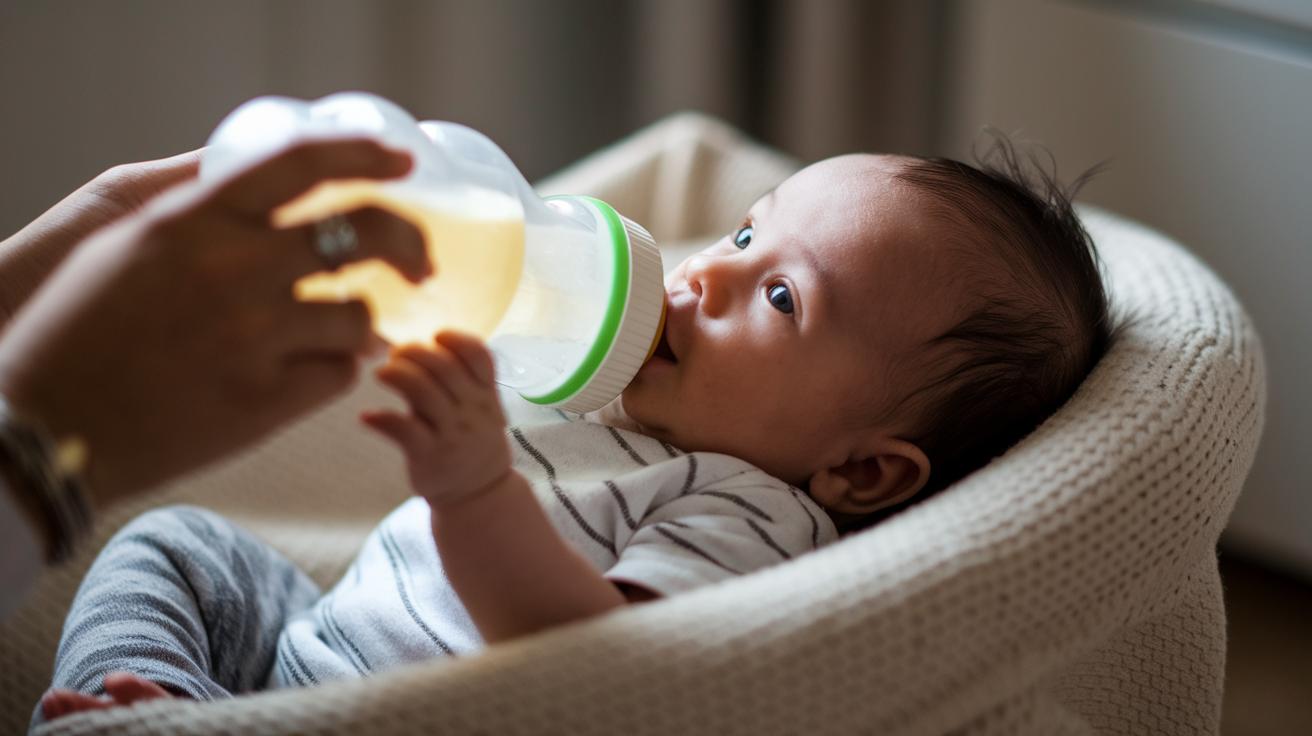
Babies grow in so many fun ways. As they get bigger, they start showing off new skills called motor milestones. There are two types: big movements that use large muscles, like crawling, sitting, and walking; and smaller movements that use little muscles, like using a spoon or picking up small toys. Imagine a baby reaching for a soft toy for the very first time, tiny fingers exploring a new texture is just delightful.

Every child moves at their own pace. One little one might roll over early while taking a bit longer to walk. Another might grab a toy easily yet need more time for bigger body movements. And if you ever feel unsure about your child’s progress, a pediatrician might suggest a quick check-up. Sometimes, a little help from physical or occupational therapy can give that extra boost for both big and small moves.

Celebrate each new step, no matter how small. Every achievement adds up to a joyful journey of growth, and isn’t that something to smile about?

Motor Development Milestones Timeline: Birth to Five Years

img-2.jpg

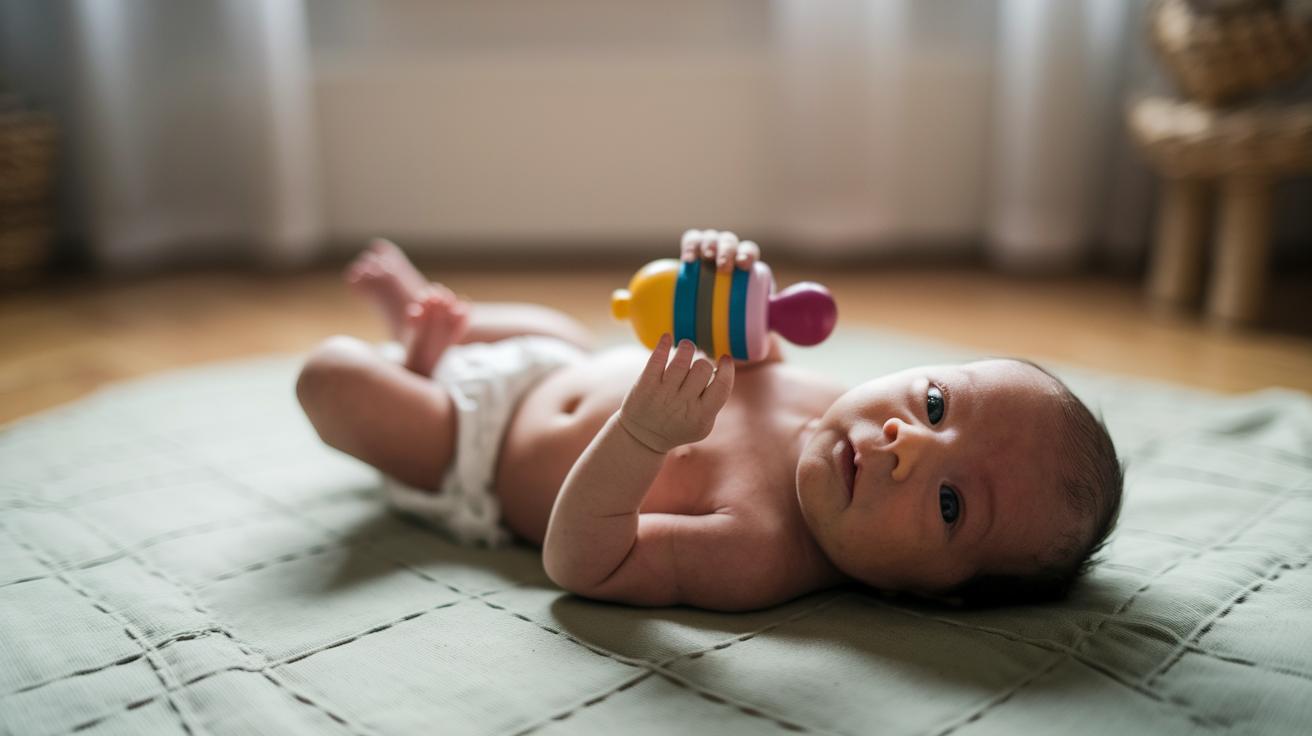
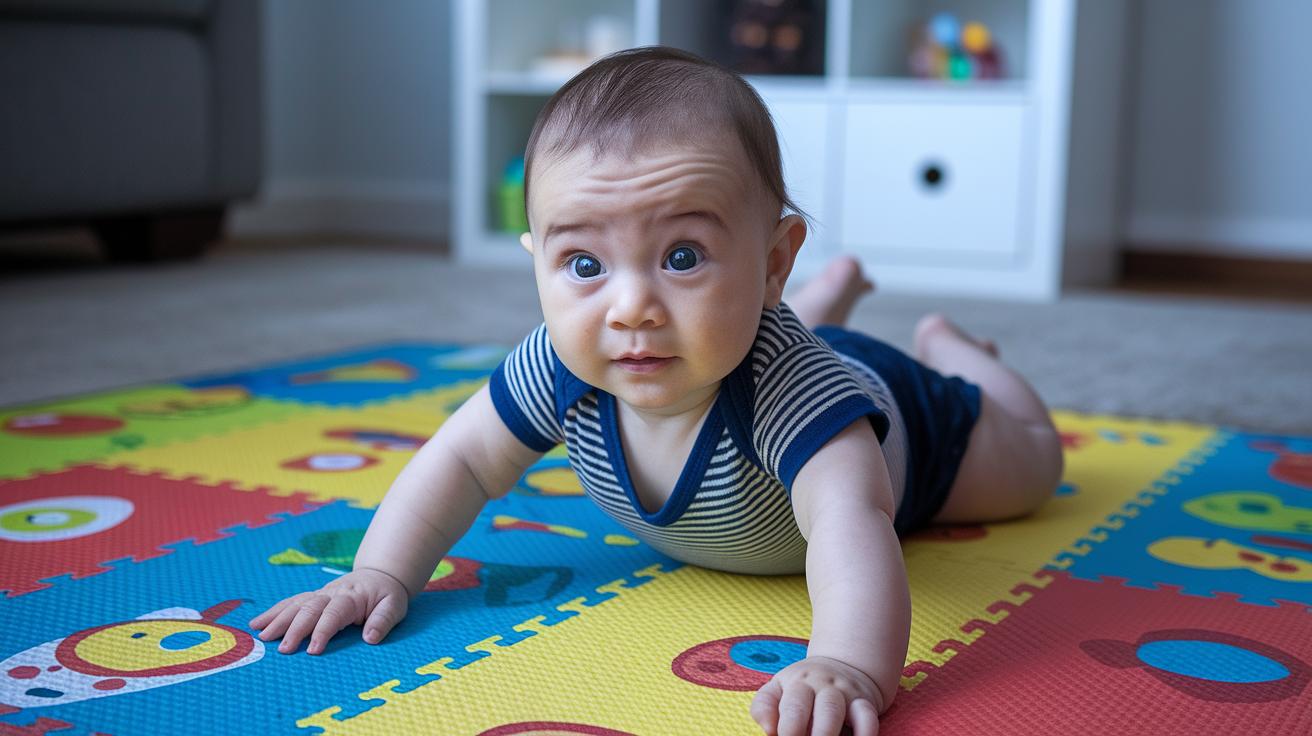
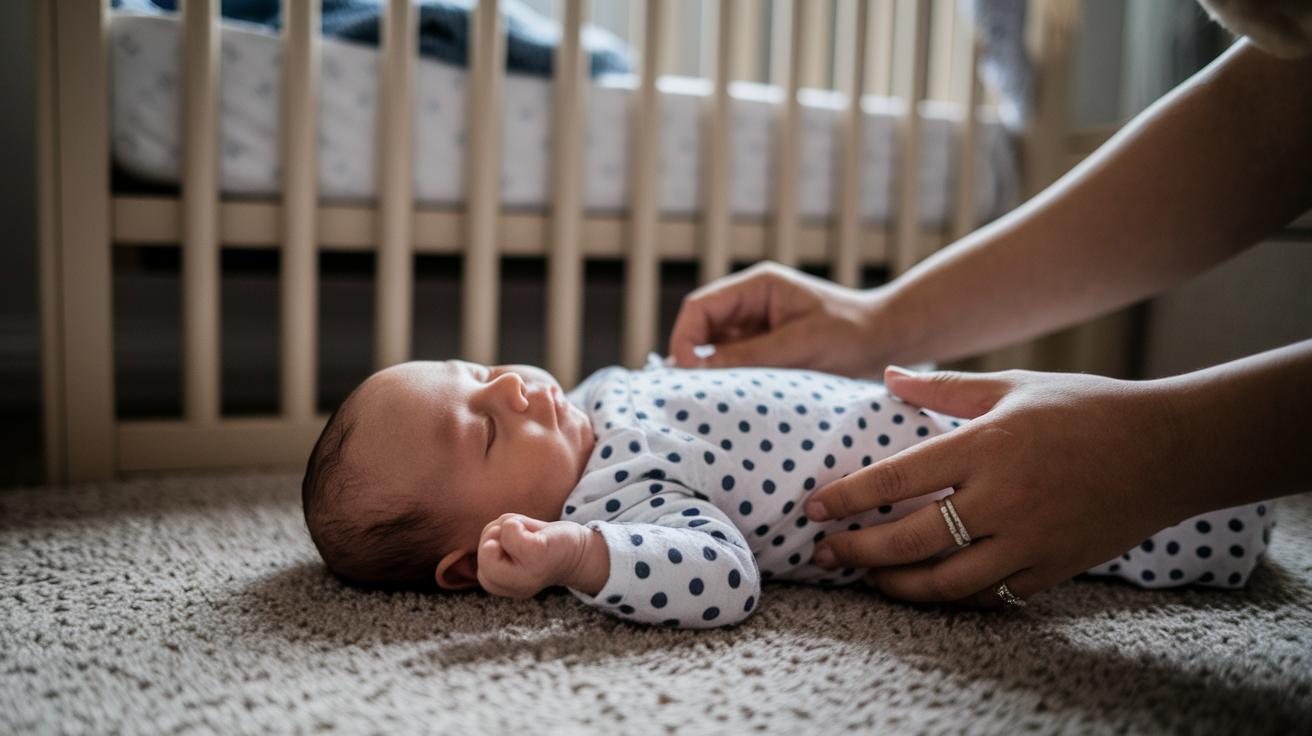
Have you ever noticed how even the tiniest movement can show big progress? Babies grow through a mix of bold movements and gentle, precise actions. Imagine a newborn during tummy time, lifting their head ever so slightly, or firmly grabbing a rattle, they're making small steps that boost their growing confidence. This timeline is like a friendly guide, showing you what many little ones typically do as they start to move and explore their world.

Below is a simple, age-by-age guide that highlights key stages. It breaks down common ages and shows both big movements, like crawling, standing, and walking, and careful skills like holding onto objects, switching them between hands, and even making simple marks when drawing. Think of it as a roadmap where each new skill builds on the one before, reminding us that every child grows in their own special way.

Age Range Gross Motor Skills Fine Motor Skills
Newborn–2 months Lifts head during tummy time; pushes on forearms Tight grasp reflex; holds rattle briefly; brings hands to mouth
3–5 months Raises head higher; uses stronger arm push Grasps strings or blocks; transfers objects from one hand to the other
6–8 months Rolls from back to belly; sits without help; belly-crawls at 7 months; crawls on hands and knees; pulls to stand Starts to fine-tune hand control when reaching
9–11 months Moves along furniture; stands alone by 10 months; takes first steps independently by 11 months Experiments with handling objects
12–14 months Creeps like a bear; moves from sitting to standing; walks on their own; even creeps up stairs 
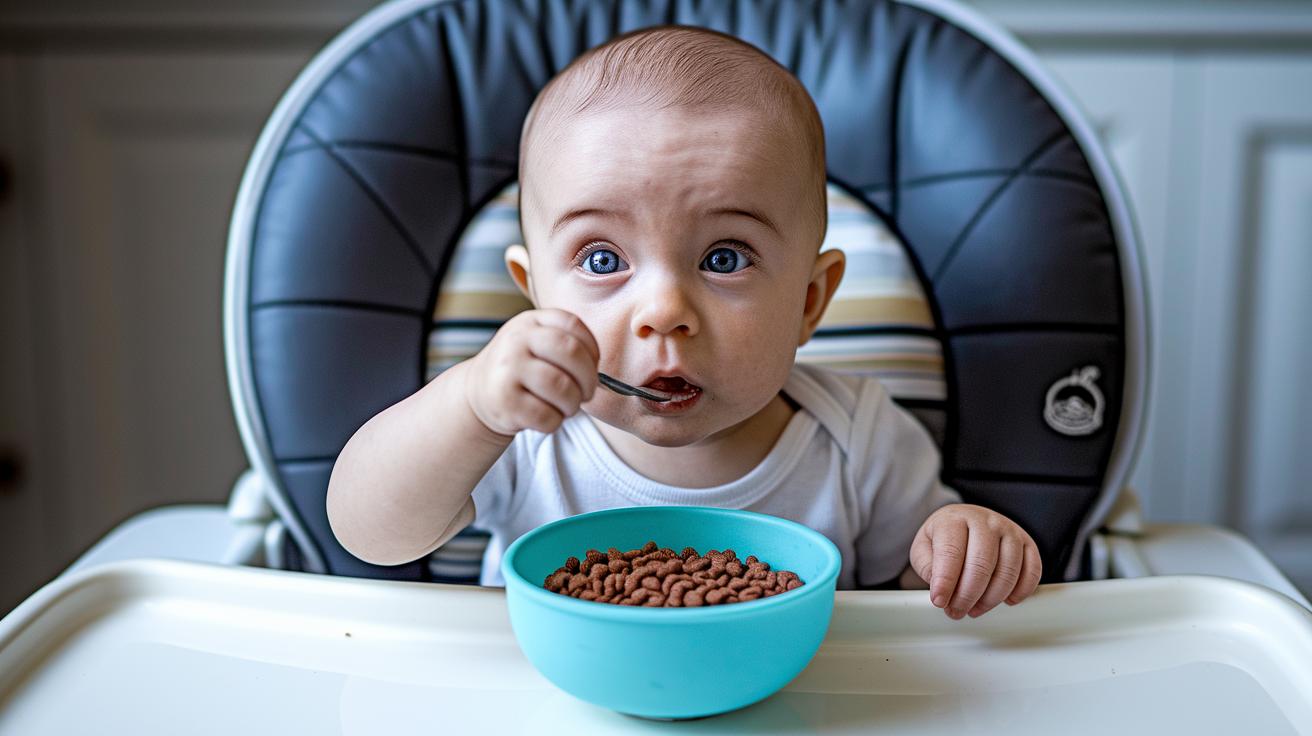
Uses a pincer grasp; feeds with a spoon; turns pages of a board-book
15–18 months Goes down stairs while creeping; walks with help both up and down; even walks backward Stacks 2–3 cubes; places shapes; holds a marker with an overhand grip
19–24 months Runs; uses a stair “step-to” pattern Turns pages one by one; stacks 4–6 cubes; draws vertical lines
2–3 years Stands on one leg for a short time; uses alternating steps on stairs 
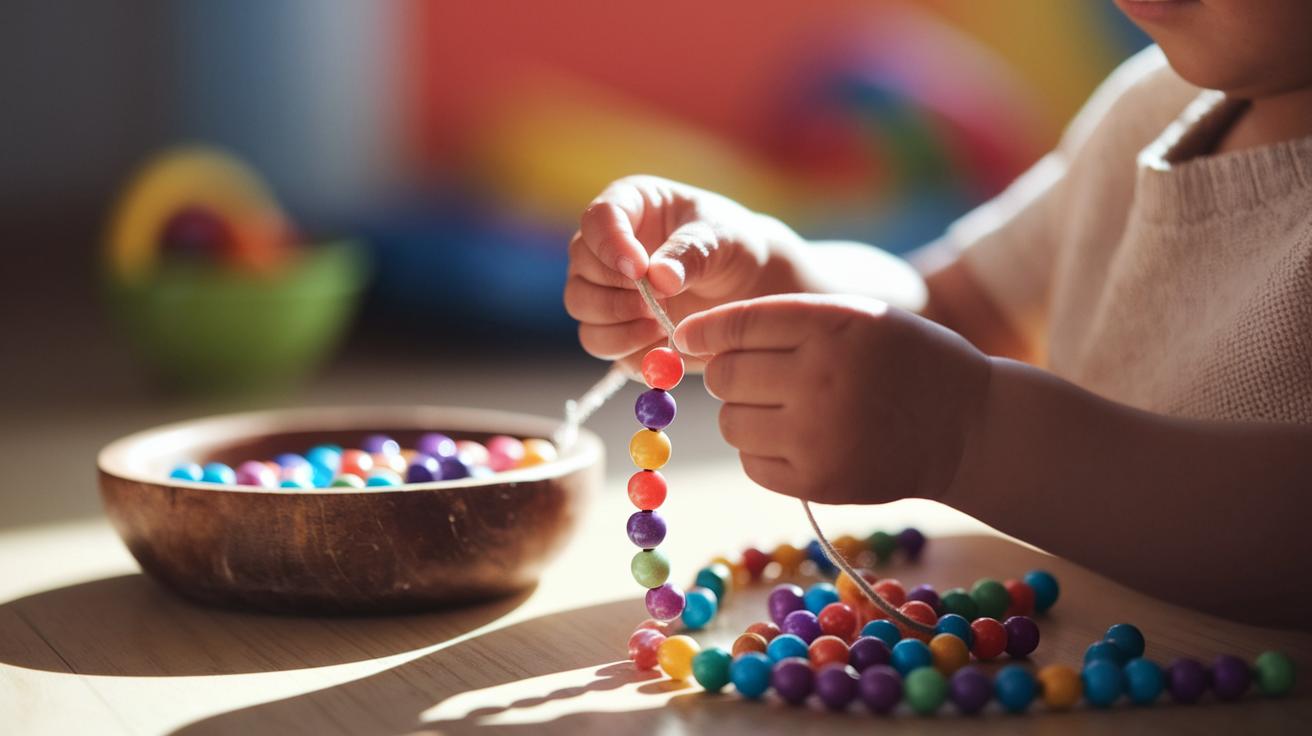
Stacks 8–10 cubes; draws circles; strings beads; uses utensils; unbuttons large buttons; cuts with scissors
3–4 years Balances on one leg for 3–4 seconds; kicks a ball; runs; jumps Ties laces through three holes; draws crosses; cuts a straight line
4–5 years Hops on one foot; balances longer on one leg; skips Draws squares; cuts simple shapes; shows a clear hand preference

Every stage is a stepping stone in a child's development. Those little everyday actions add up to create the beautiful journey of growing up.

Identifying Delays in Motor Development Milestones

img-3.jpg

Keep a gentle watch over your little one’s movements. If you notice that your baby isn’t lifting their head during tummy time by about 4 months, it might mean their big movements are taking a bit longer to develop. And if your little one isn’t reaching for, grabbing, or playing with toys by 6 months, it could be a good idea to get them checked to see if everything’s on track.

Next, notice if your child isn’t rolling over or sitting by around 8 months, or if they haven’t started crawling or pulling themselves up by 12 months. And if walking hasn’t begun by 18 months, it’s really worth talking to your pediatrician.

Sometimes, the small, careful movements tell a story too. Imagine a toddler who finds it tough to stack blocks or even turn the pages of a book at the right age. Not showing a pincer grasp by 15 months or having a hard time with hand–eye coordination might mean it's time to ask for some professional advice.

Also, watch out for signs like uneven movement or soft, low muscle tone. These could suggest that early help might be needed to support your child’s growth. In truth, keeping an eye on these signs can help you give your little one the best start possible.

Parental Monitoring and Early Intervention for Motor Development Milestones

img-4.jpg

Keep a simple chart that highlights your child’s amazing milestones each week. Write down every new skill you see, whether it’s a fun shift in posture, grabbing a favorite toy, or even the first cute scribble. This helps you see just how much your little one is growing day by day.

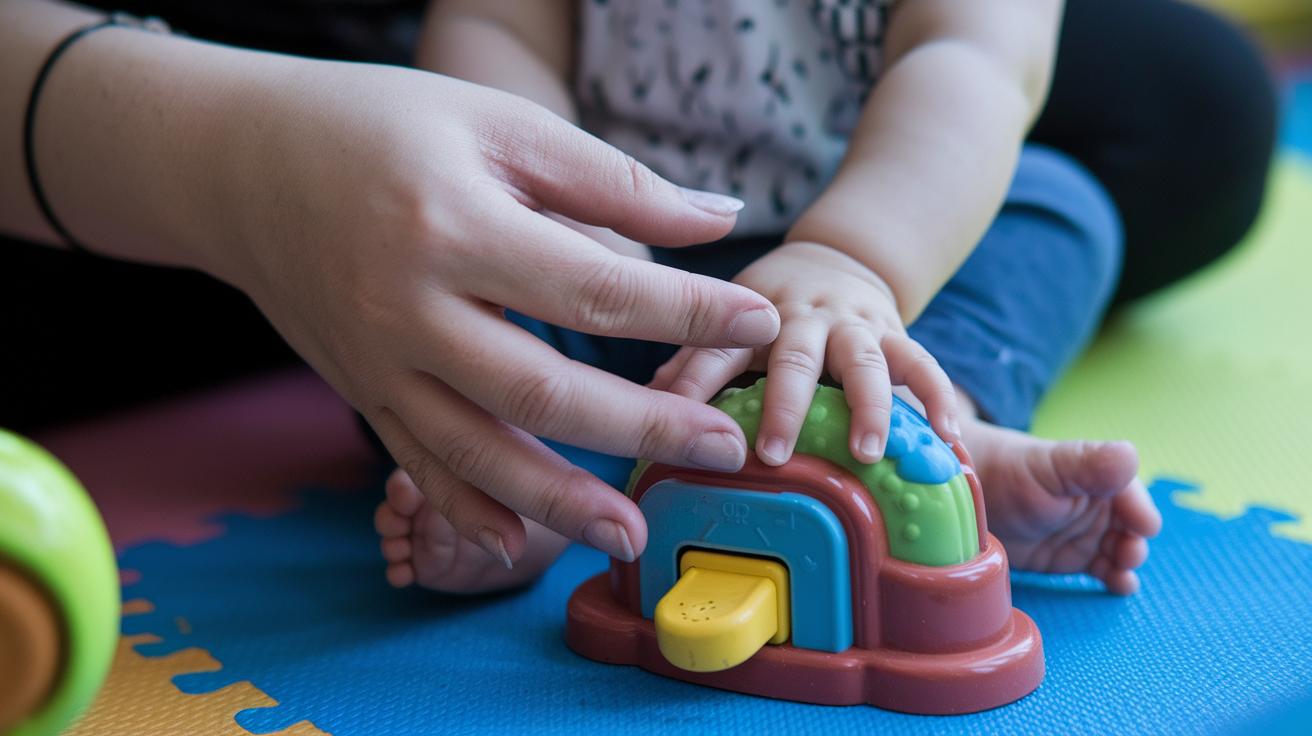
Watch for little signals like how well they keep their head steady, how their body stays balanced during play, and the way they reach out for objects. These small moments tell a big story about their developing motor skills, they’re like little hints of progress along the journey.

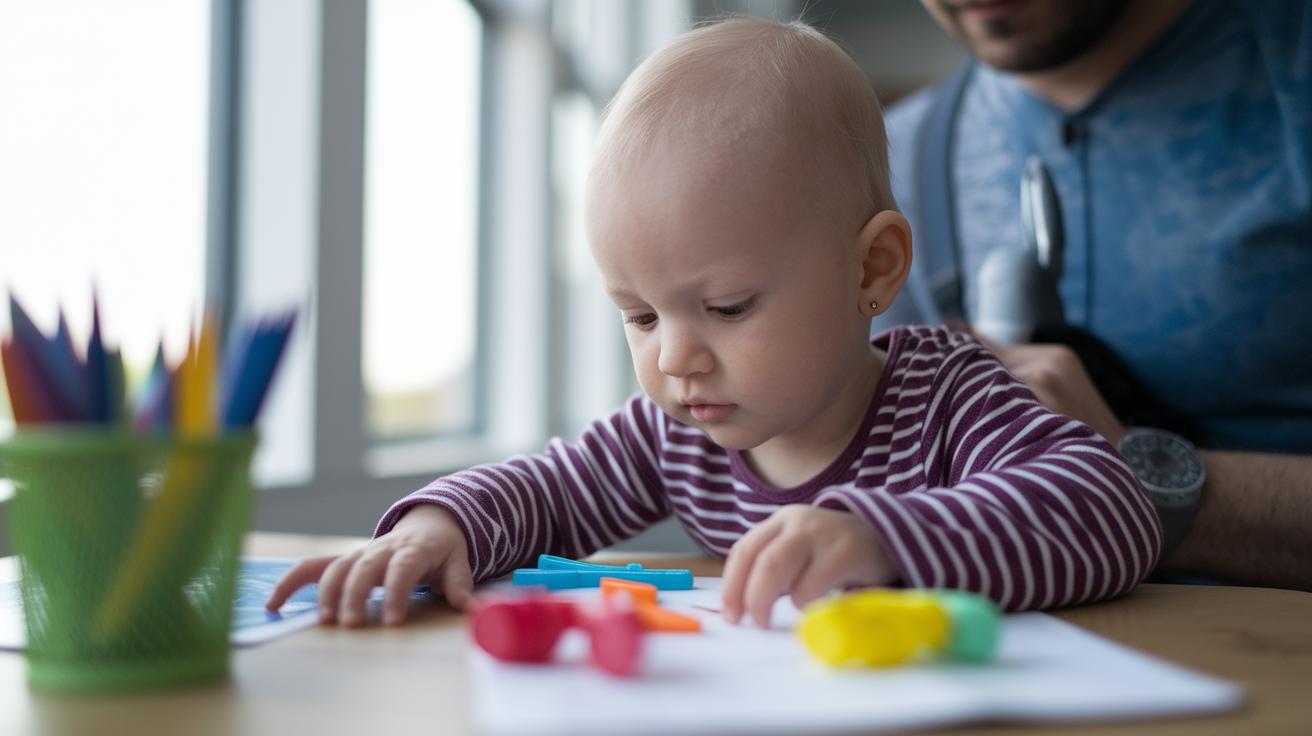
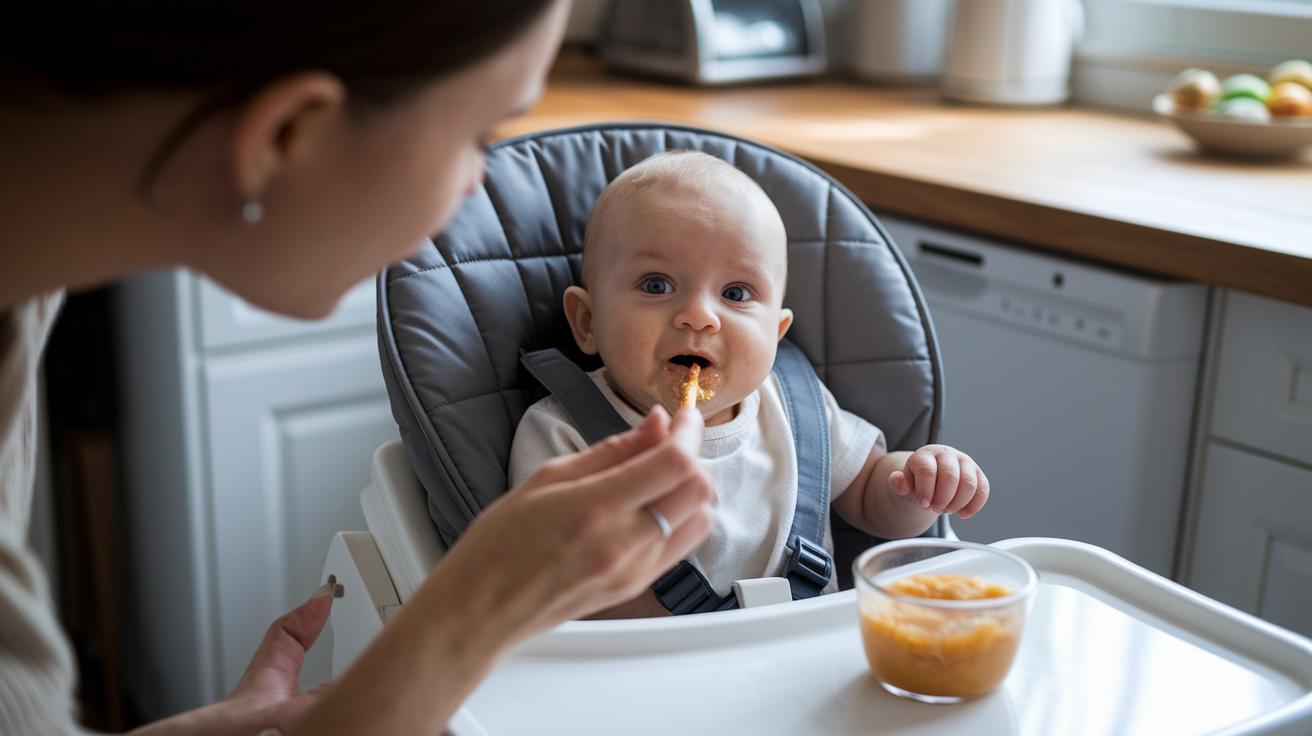
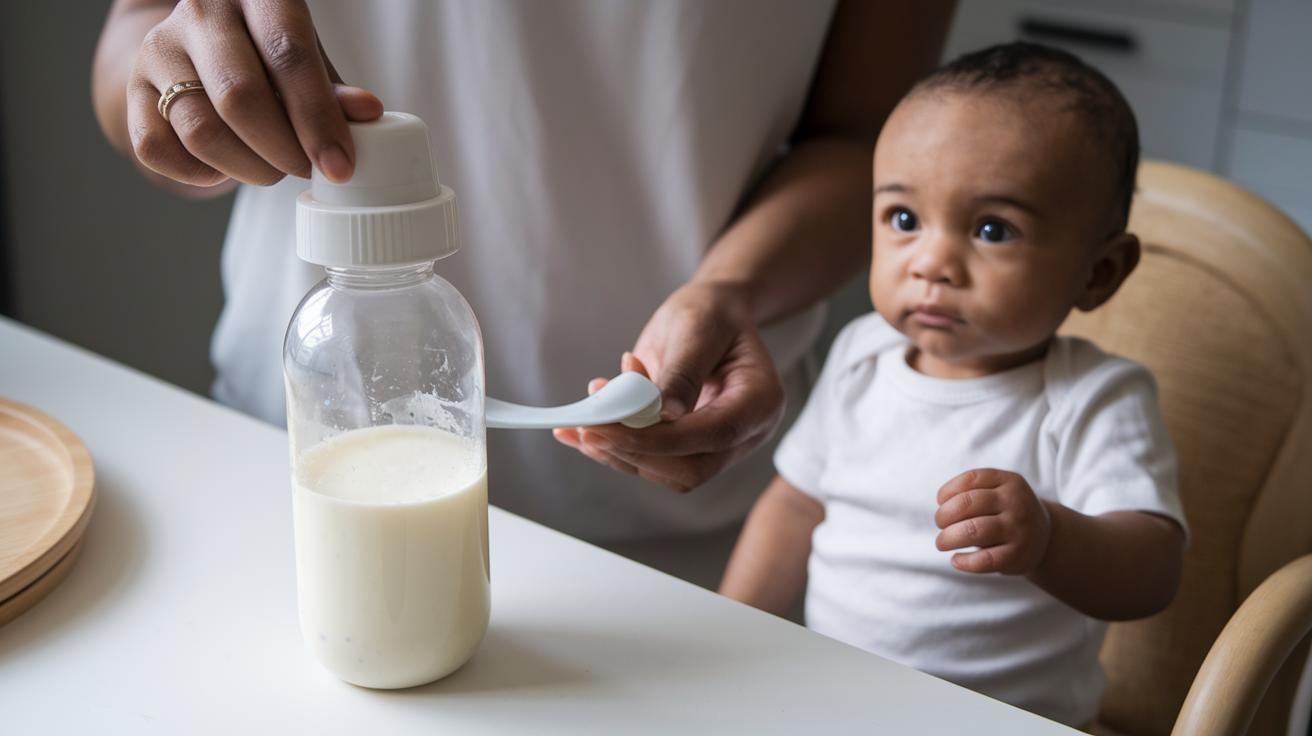
Notice when your child tries new movements with their hands. Whether they’re grasping simple shapes, exploring self-feeding, or experimenting with early scribbles, each act shows their progress in hand coordination and precision. Even the tiniest movement is a sign of growing strength and skill.

Plan regular check-ups at 2, 4, 6, 9, 12, 18, and 24 months. These visits give your doctor a chance to do helpful screenings and see how your child’s motor skills are developing. It’s a special time to celebrate growth and get expert advice.

If you ever feel a bit worried or sense that your child might be taking longer to pick up some skills, ask for help. A referral to a friendly occupational or physical therapist can offer extra support tailored just for your little one’s needs.

Keep a personal log of all these little victories. Each note is a celebration of your child’s joyful steps forward, a record of everyday growth that warms your heart and reminds you how proud you are of each small, precious achievement.

Motor Development Milestones Inspire Joyful Growth

img-5.jpg

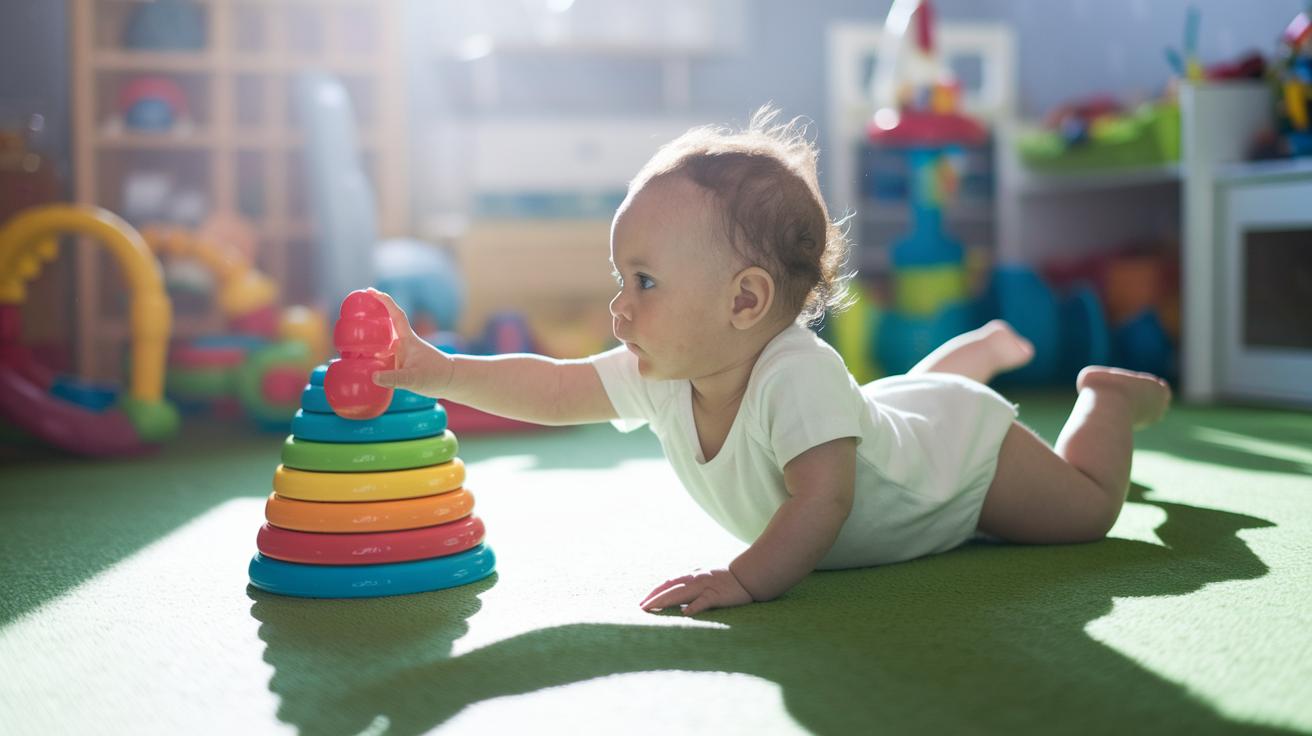
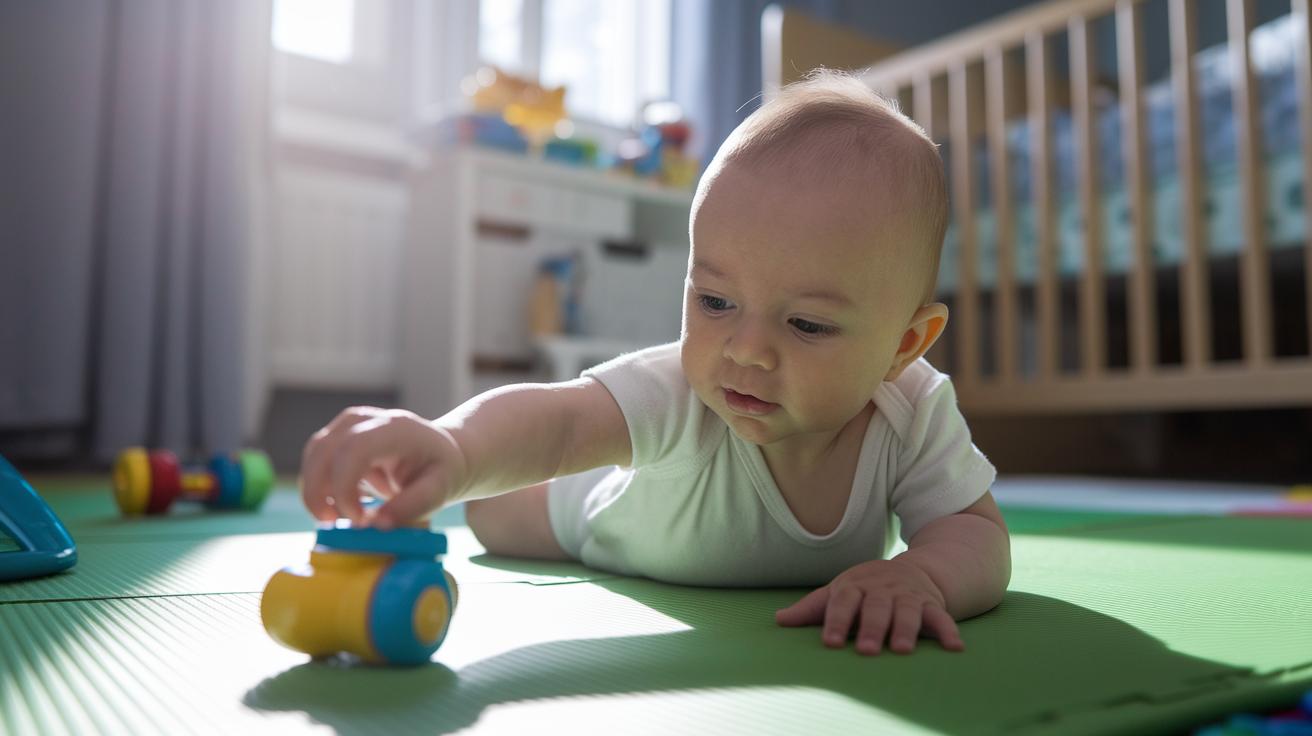
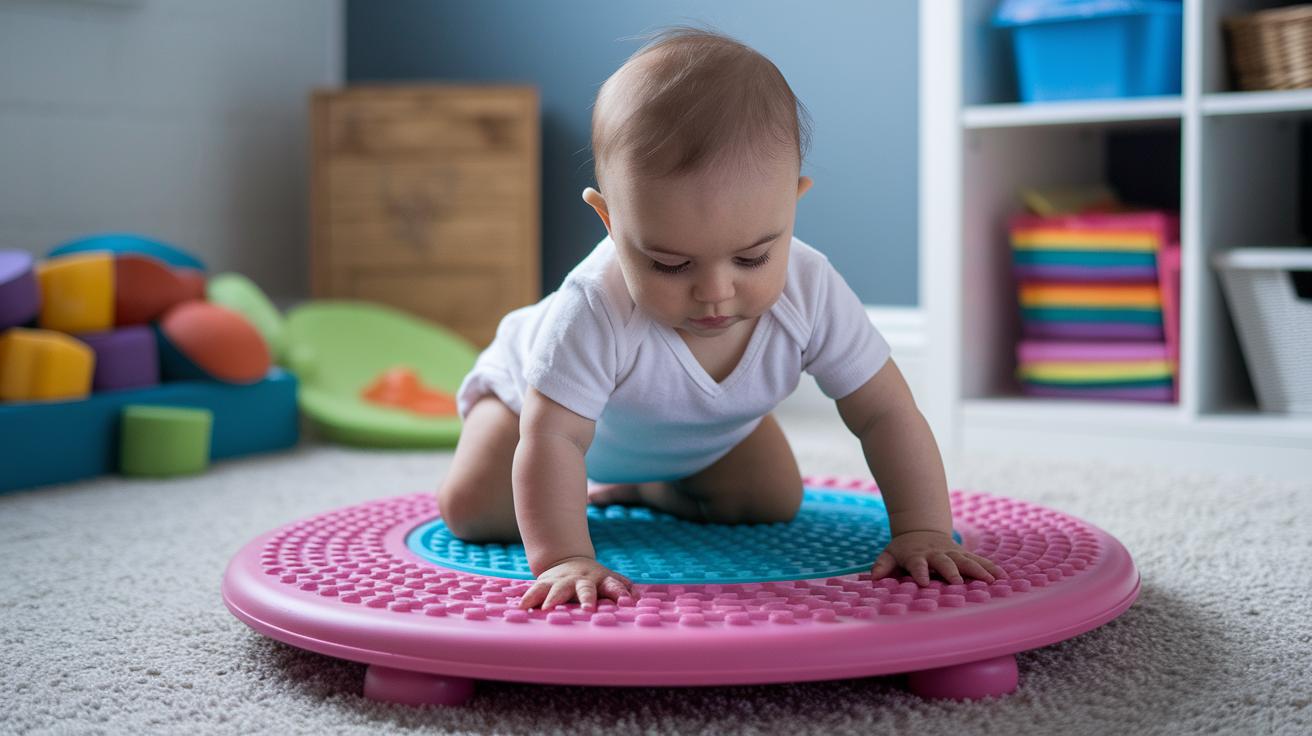
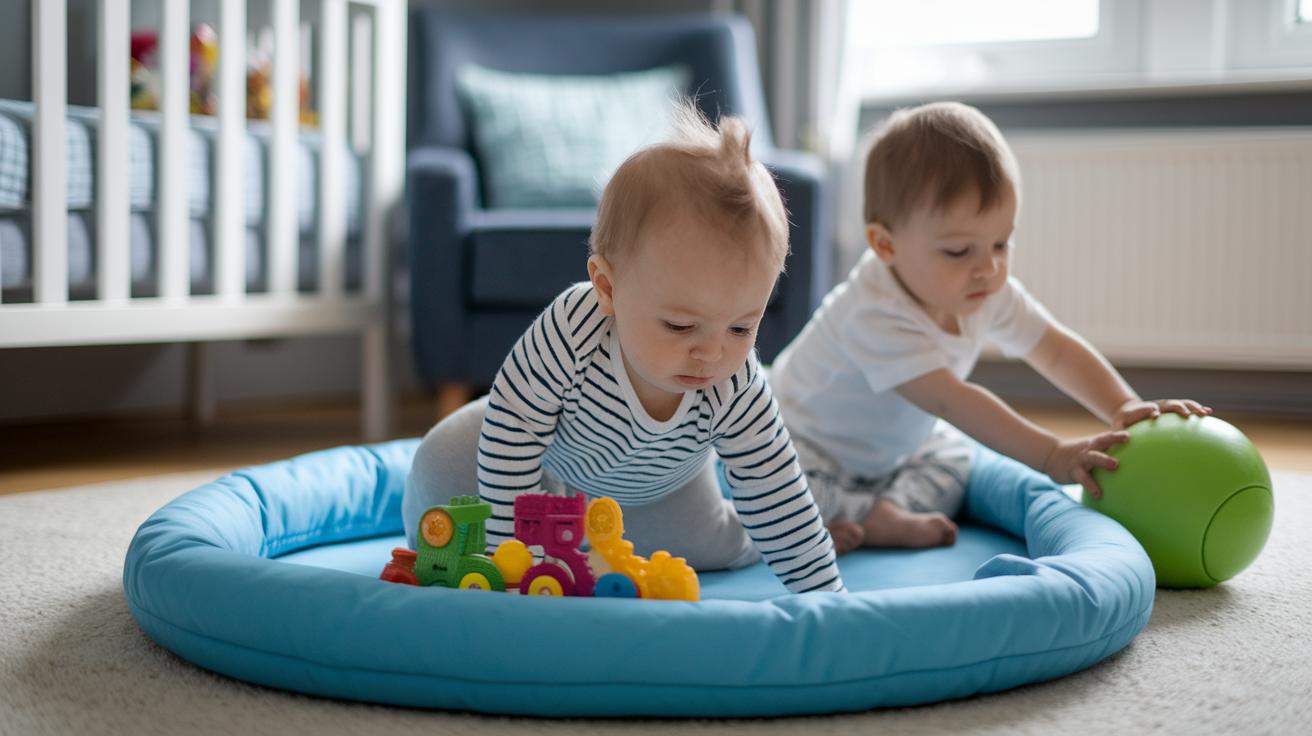
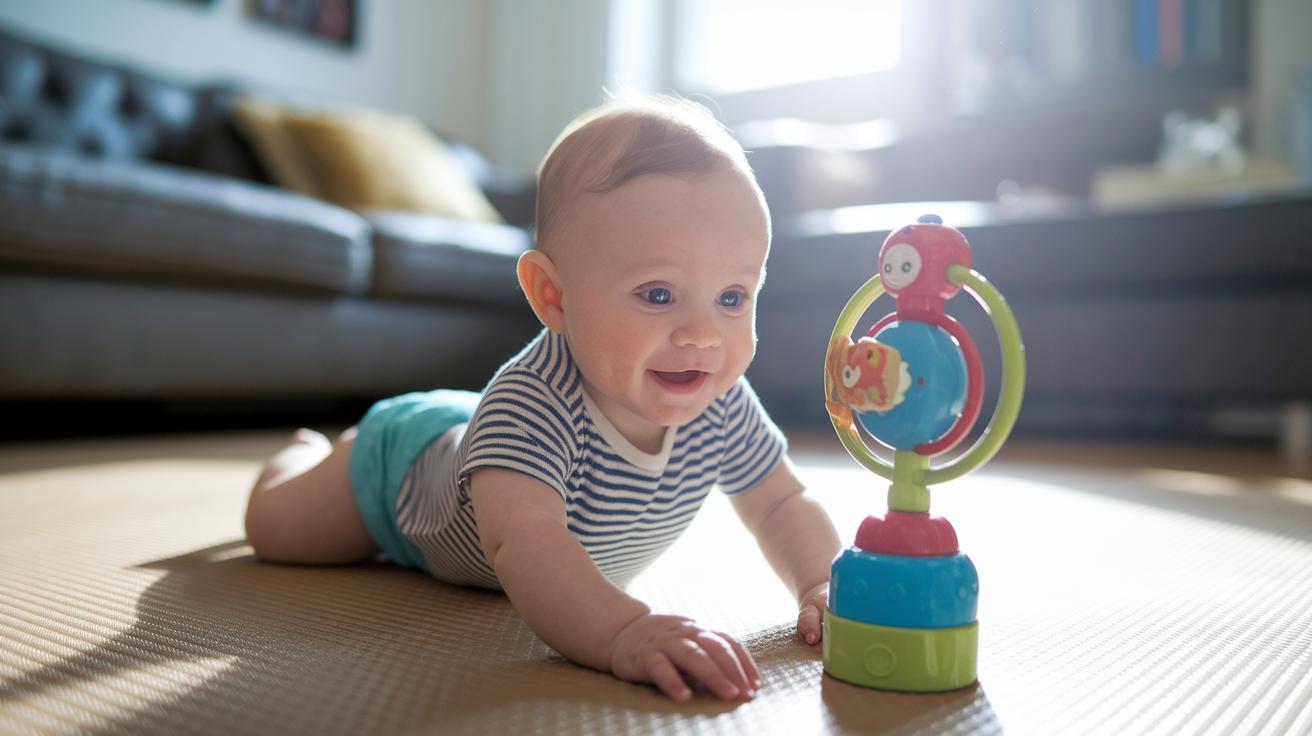
Playing with your little one isn’t just fun, it also helps build both big movements and the small, delicate skills they need. Imagine setting your baby on their tummy with a colorful toy just out of reach. This simple game not only strengthens their core but also encourages them to reach and twist. It’s like taking a tiny step toward better balance, and it can be really exciting to watch.

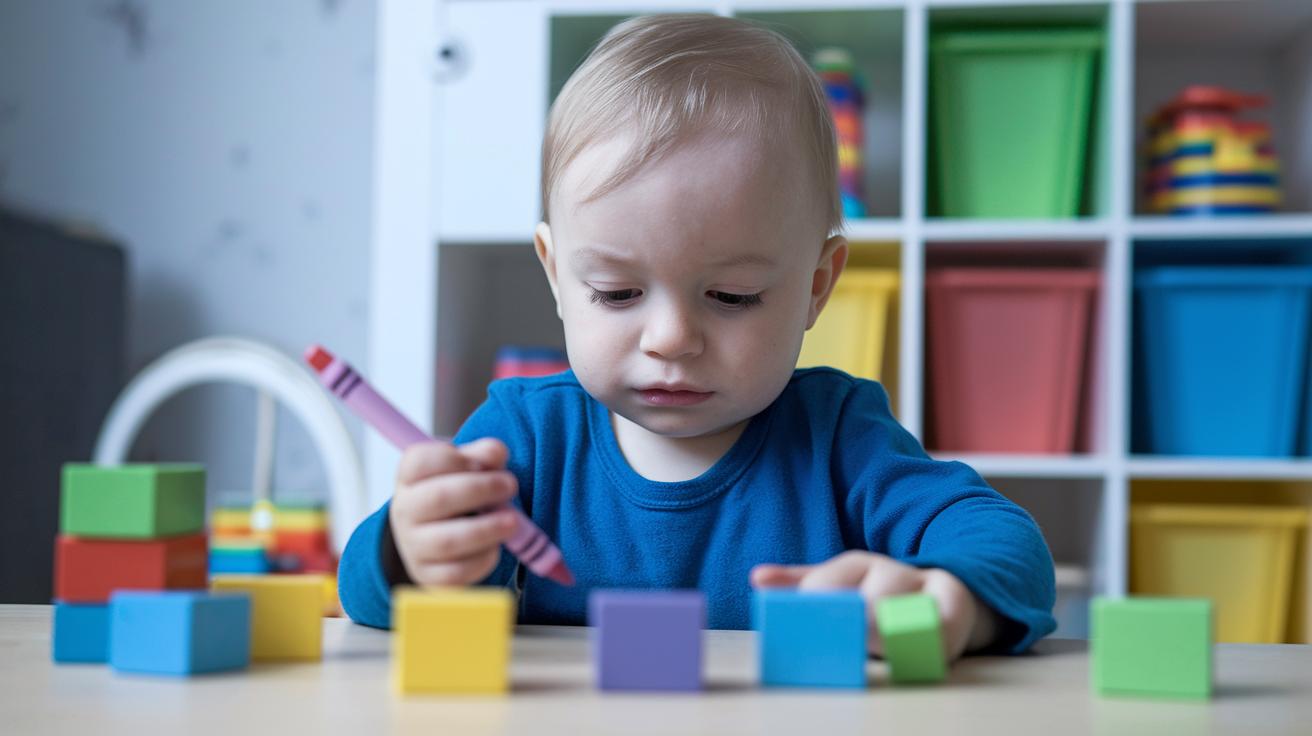
There are many playful ways to boost their skills. For example, you might try stacking blocks or playing with shape sorters. You could say, “Place the red block over there,” and watch as your child learns how to hold and move the blocks just right. These activities help sharpen their grasp and improve the way they use both hands.

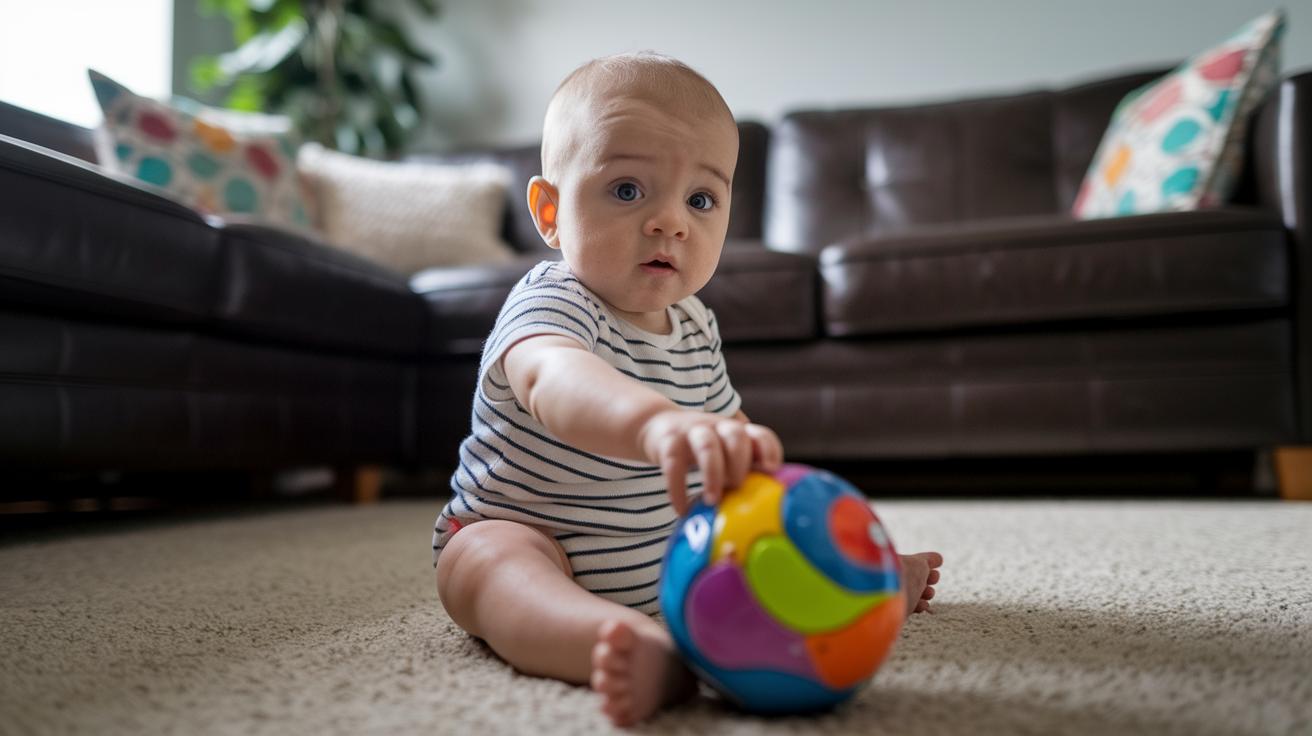
And there’s more! Toys that you can push or pull, along with soft balls, are great for building leg strength and balance. Picture your child happily shuffling a small ball across the floor, all those little pushes help build muscle strength and coordination.

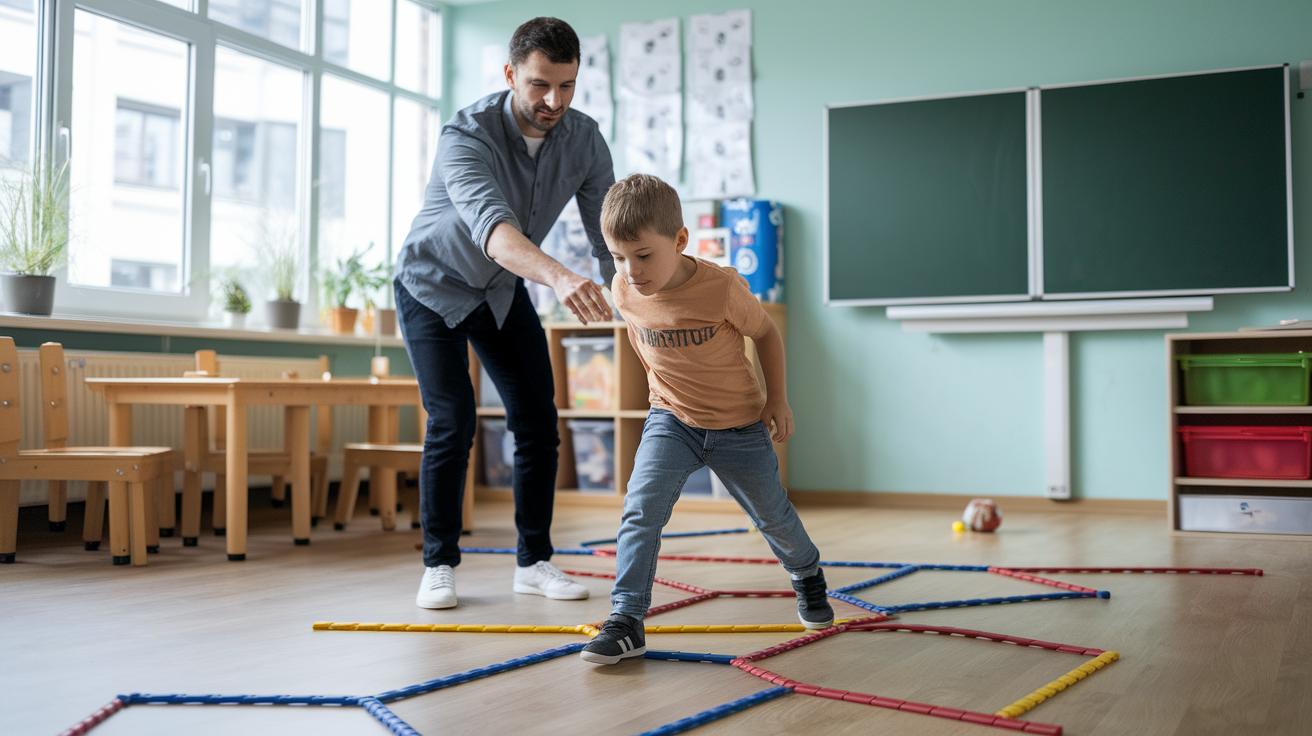
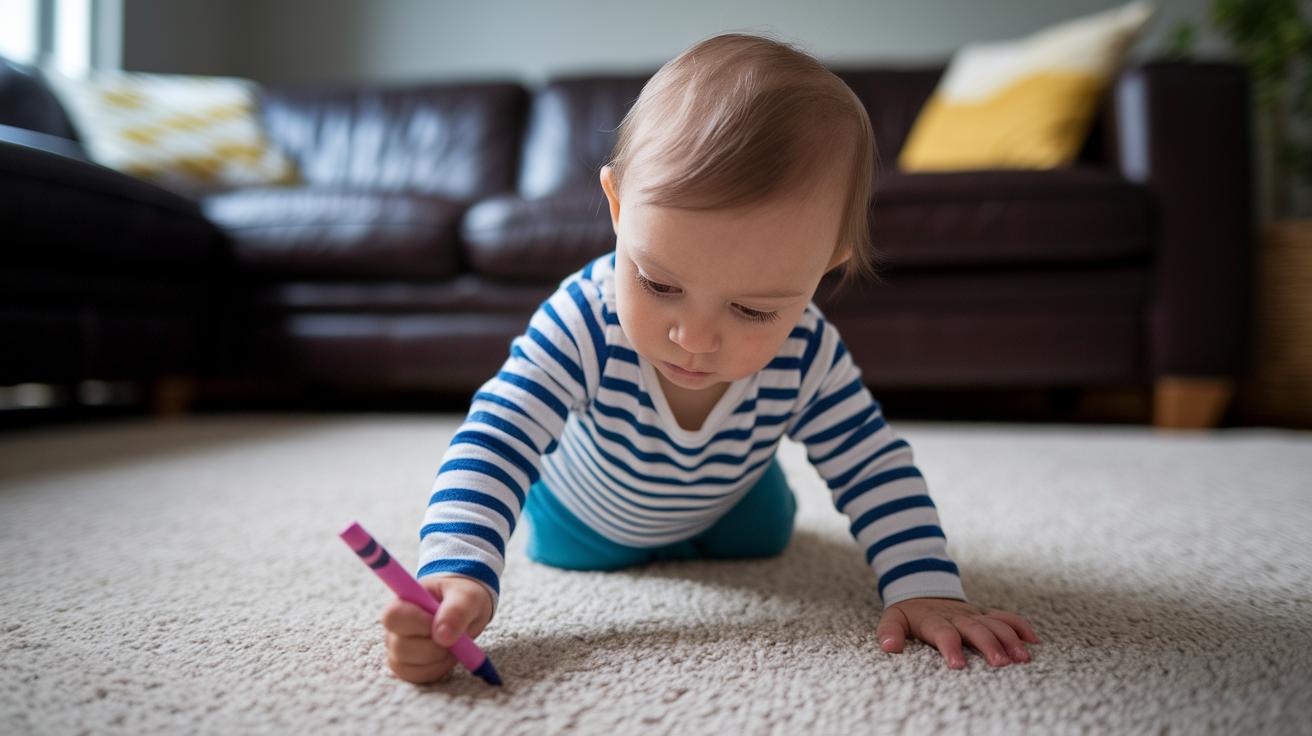
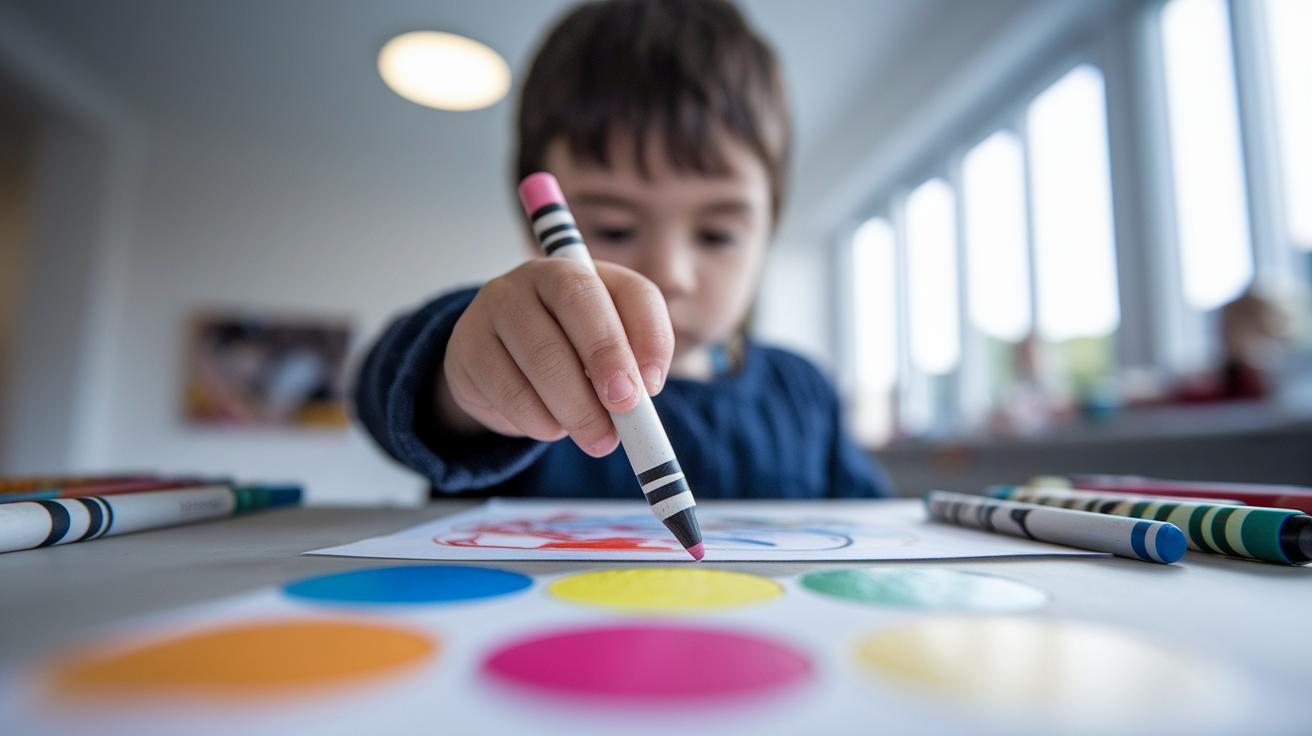
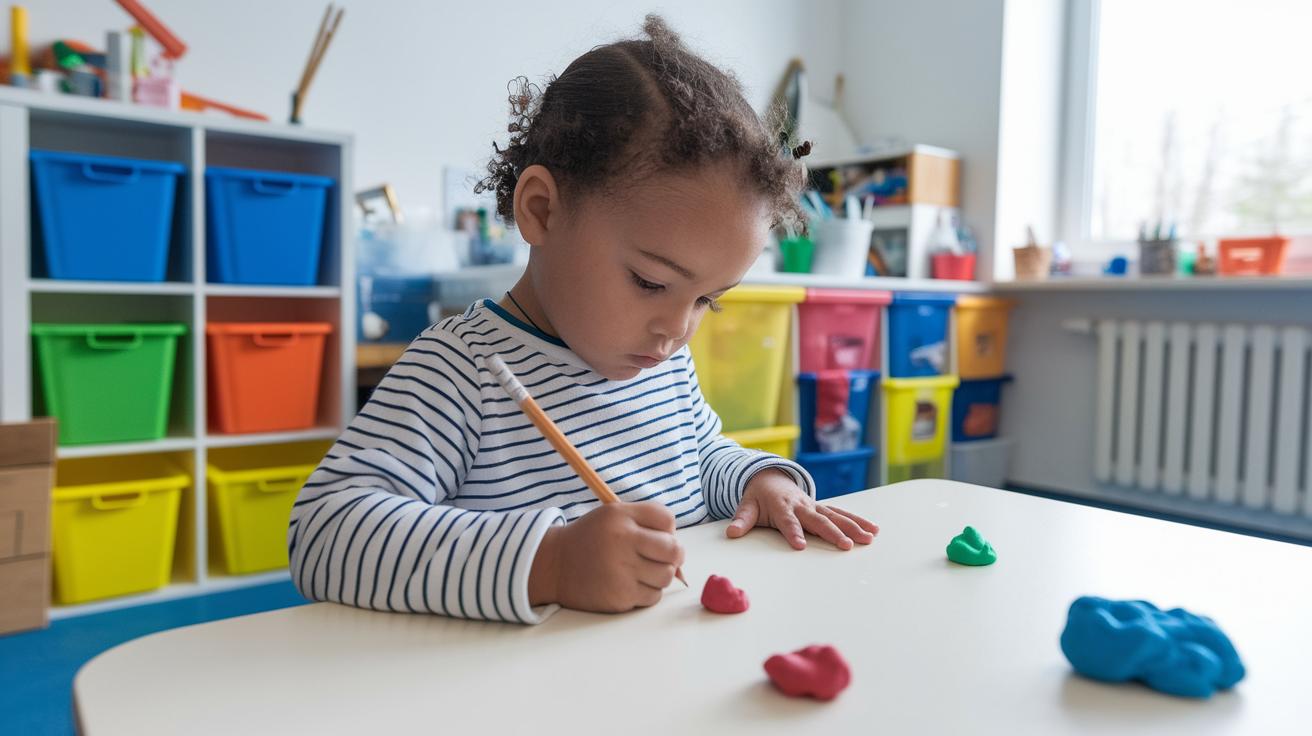
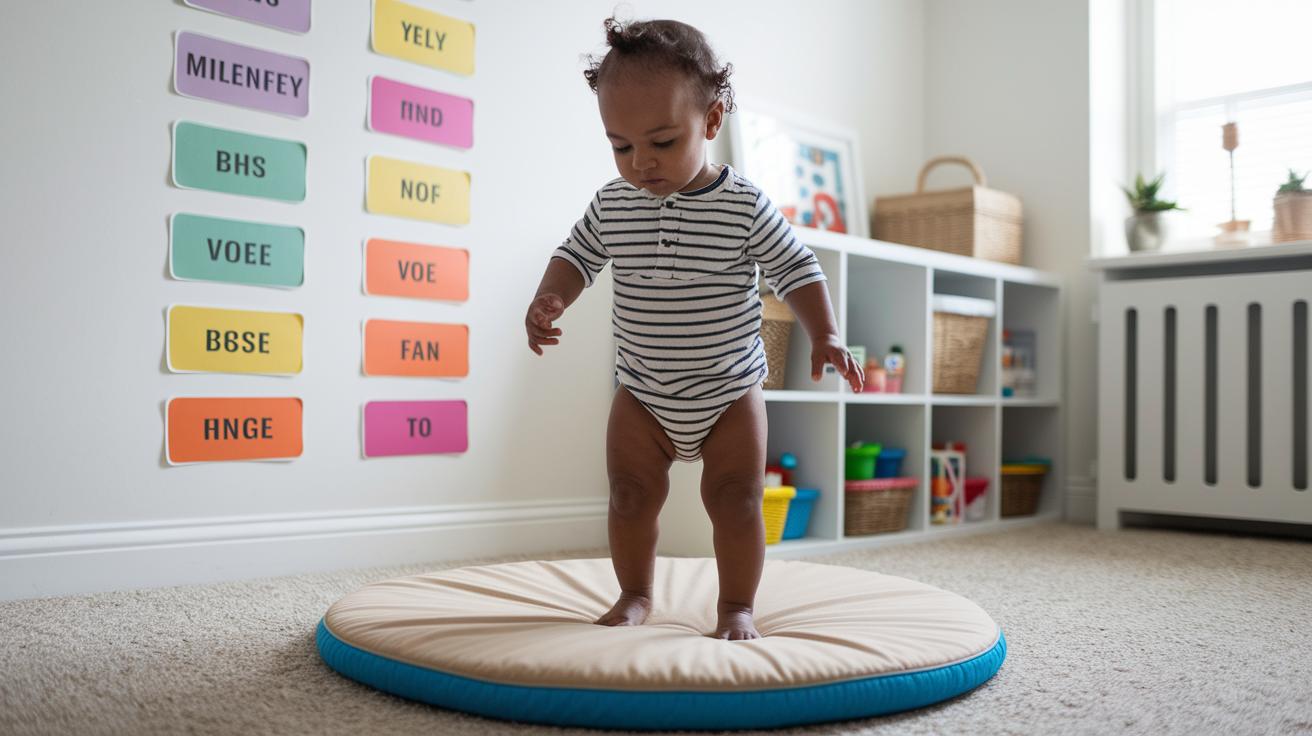
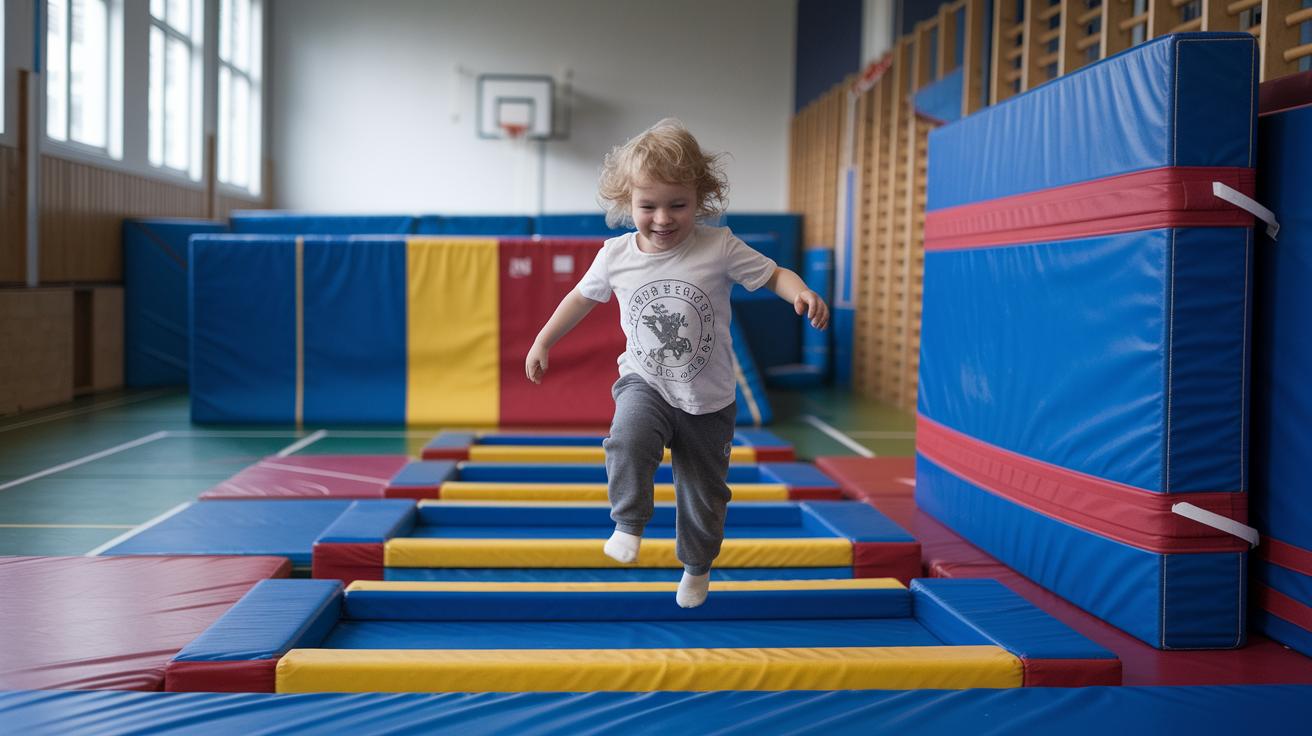
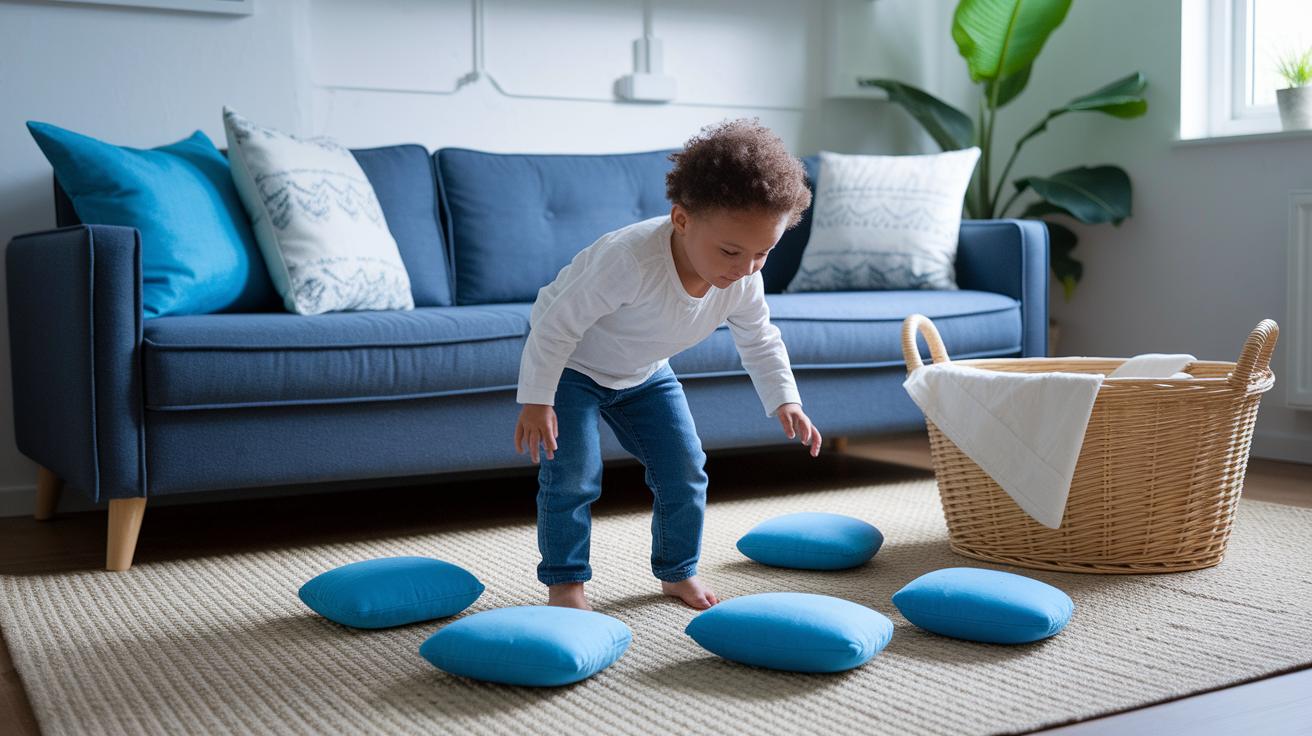
Don’t forget about art time either. Early scribbling with large crayons can gently pave the way for drawing with smaller markers later. You might even set up a simple obstacle course with cushions or low platforms. This turns playtime into a mini adventure that encourages crawling, climbing, and standing with balance in a safe space.

  • Tummy time with a brightly colored toy
  • Building towers with your favorite blocks
  • Kicking a soft ball for fun
  • Scribbling away with crayons

Each of these playful moments supports your child’s motor skills, step by step, with a touch of fun and plenty of heart.

Tracking and Charting Motor Development Milestones at Home

img-6.jpg

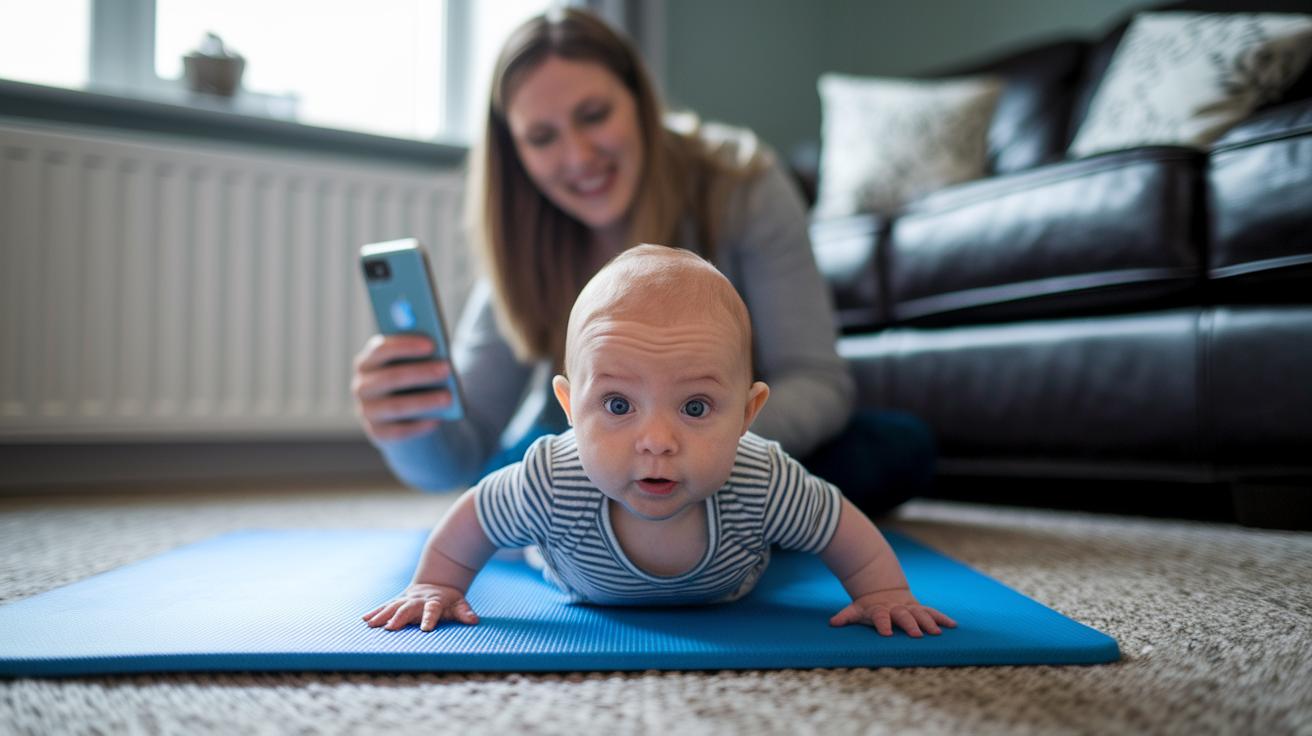
Keeping a simple record of your child's new motor skills gives you a clear picture of their progress and helps you notice early on if something seems off. It’s like creating a little diary of moments, from the first wobbly crawl to stacking blocks for the first time. When you jot down a new skill, say, "First crawl on June 3rd", try to add a photo or a quick video to capture that special moment.

Taking a few minutes now and then to look over your notes can help you see any changes in your child's movement and provide helpful details to share during visits with your pediatrician.

  • Keep a home chart or digital log to note every new skill along with the date.
  • Add photos or short videos to capture those delightful first moments, like a crawl, stacking blocks, or a first scribble.
  • Use fun and memorable captions such as "First scribble captured on a sunny morning."
  • Check your log every month to see if there are any noticeable shifts in movement.
  • Bring these records along to your pediatric visits so you can share detailed observations.

Professional Support and Resources for Motor Development Milestones

img-7.jpg

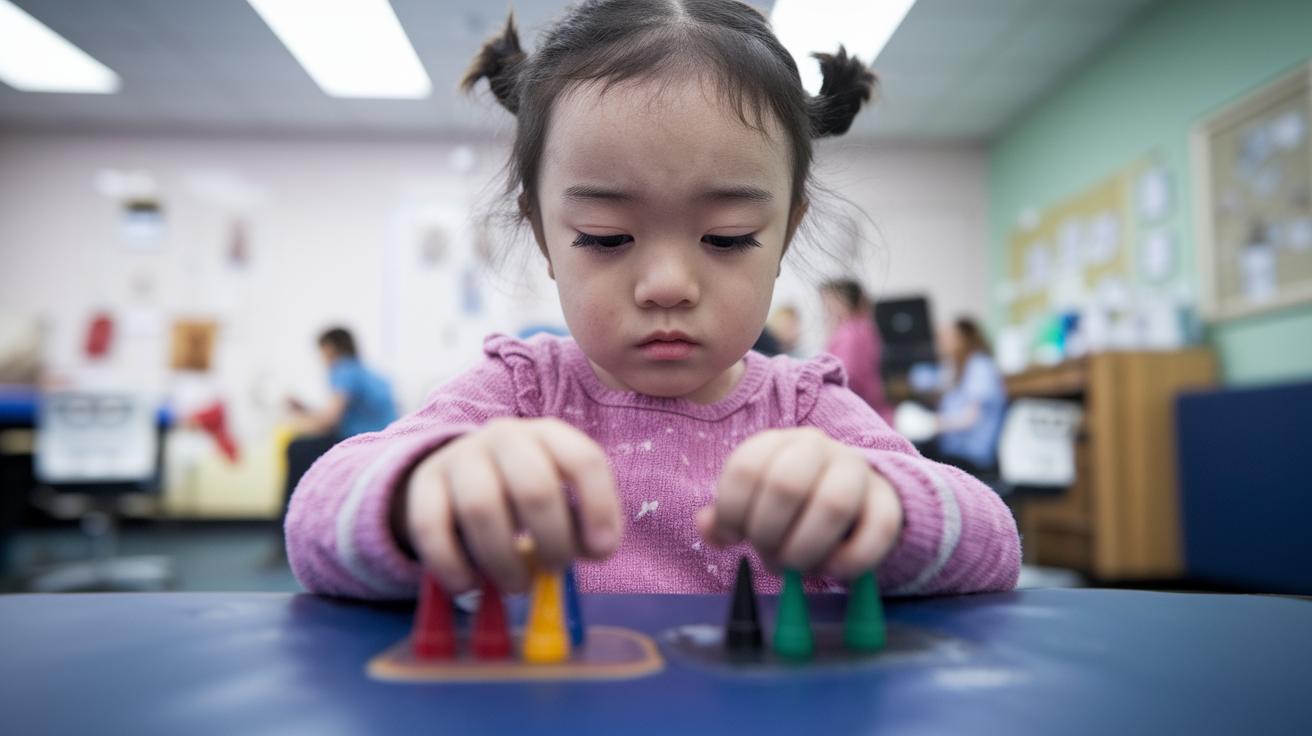
Sometimes our little ones need a bit of extra help, and pediatricians can refer children under 3 to local Early Intervention programs. These community programs offer free developmental check-ups. For instance, a pediatrician might say, "Let’s get you checked at a community program that offers these free screenings," to make sure everything is on track.

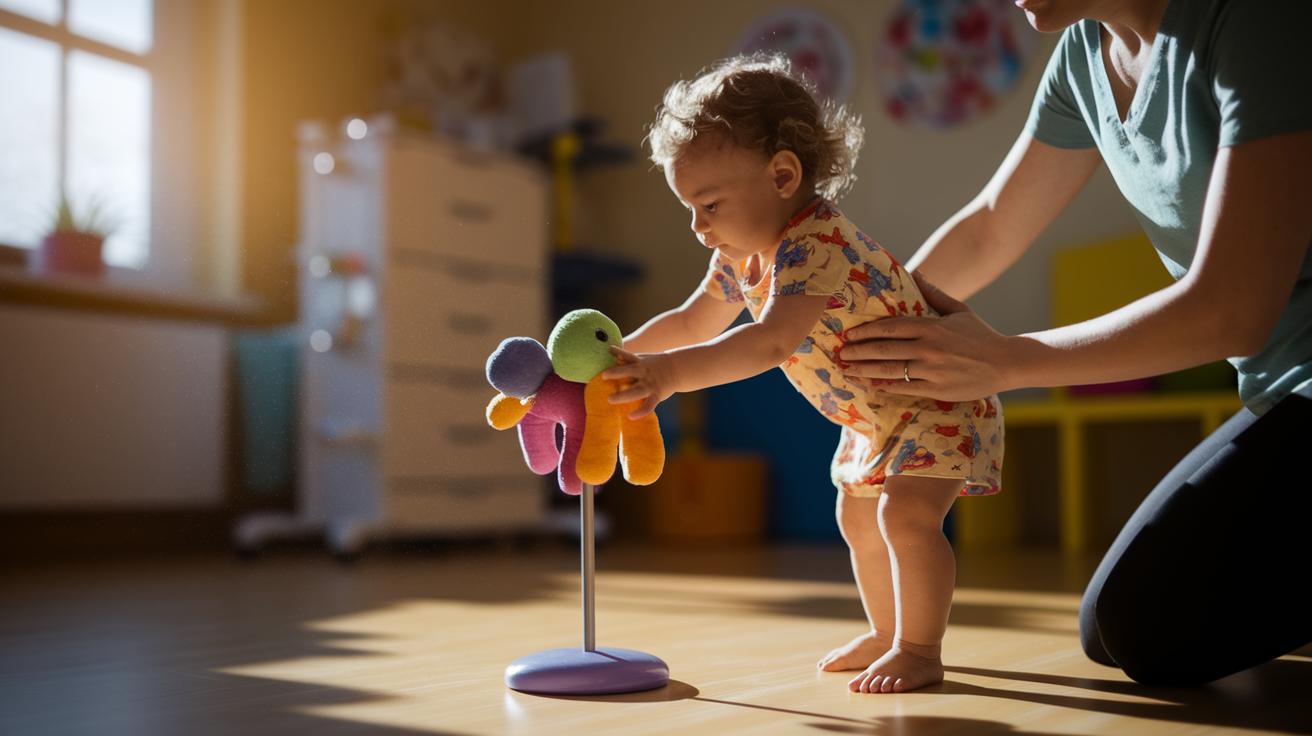
Physical therapists are wonderful partners in building strength and balance. They work with children to develop strong muscles, improve balance, and keep good posture. This support is especially helpful for kids who might need a little extra push to crawl, stand, or walk with confidence.

Occupational therapists focus on the small, but important, details. They help kids learn fine motor skills such as grasping, holding, and maneuvering objects, skills that are vital for everyday tasks. Many child development centers also offer helpful parent workshops, free screening tools, and other community resources that give families useful tips and easy-to-follow techniques.

With care from these professionals, families often feel more relaxed and confident, knowing their child is growing and developing just as they should.

Final Words

In the action, we explored the big picture of motor development milestones, looking at both fine and gross skills from infancy through preschool. We broke down age ranges, pointed out key signs to watch for, and shared simple, playful activities mothers can do at home for skill building. We also touched on practical tips for tracking progress and when to seek extra support from health professionals. Every child's pace is different, and keeping a positive outlook is key as they grow and thrive.

FAQ

What are motor development milestones?

Motor development milestones refer to the observable skills that most children reach as they grow. These include large muscle movements like crawling and walking, as well as precise actions such as grasping and drawing.

How are fine motor skills defined and which five are common?

Fine motor skills involve hand and finger coordination, such as grasping small objects, transferring items between hands, using a pincer grasp, stacking blocks, and making early scribbles.

What are the key stages of motor development in childhood?

Key stages in motor development include early reflex movements in newborns, progressing to sitting, crawling, standing, and walking, then advancing to refined skills like stacking, drawing, and using utensils.

What motor development milestones are typical in infants?

In infants, typical milestones include lifting their head during tummy time, grasping objects, rolling over, sitting without support, and starting to pull themselves to stand as they grow.

What actions should parents take if they suspect a delay in motor milestones?

When a child does not reach expected milestones, such as not lifting the head by four months or not walking by 18 months, parents should consult their pediatrician to consider a professional evaluation.

Motor Development: Inspiring Growth In Skills

0

Ever wondered how a little grab turns into a brave step? It’s not just about muscles growing; it’s a series of small moves that help our children become more independent.

Think about your baby: one moment they’re reaching for a crayon and the next they’re taking a wobbly step. Each movement is a sign of progress and a step toward exploring the world on their own.

This guide shows how early reflexes turn into actions that spark creativity and build both small (fine) and big (gross) motor skills. Let’s take a look at these little milestones that gently shape our children’s futures.

Understanding Motor Development: A Framework for Skill Progression

img-1.jpg

Motor skills are the ways our muscles help us with everyday tasks. They start with simple, automatic actions when babies are born and slowly become careful, intentional moves. We usually talk about two kinds of motor skills: fine motor skills and gross motor skills.

Fine motor skills use the small muscles in our hands and wrists. These skills allow children to pick up small objects, hold spoons, or stack blocks. Imagine your child holding a crayon for the very first time, it’s a small grasp that opens up a world of creativity. These early skills pave the way for more detailed tasks like writing or drawing later on.

Gross motor skills involve the larger muscles in the arms, legs, and torso. With these skills, kids learn to roll over, sit up, crawl, stand, and eventually walk. Think about your toddler taking those first wobbly steps, it’s the start of a journey towards independence and fun adventures.

At the heart of all this is neuromuscular control. What begins as simple reflexes in a newborn slowly turns into smooth, controlled movement as they grow. Often, developmental charts are used to keep track of these changes, ensuring that every little step is supported with care and understanding.

Motor Development: Inspiring Growth in Skills

img-2.jpg

Here’s a friendly guide to all those little milestones your baby reaches as they grow. This chart walks you through those moments, from early reflexes to intentional movements that show off your child's growing strength and coordination.

Age Range Milestones
Newborn–2 months Lifts head during tummy time; exhibits tight grasp reflex
3–5 months Holds head up steadily; reaches for toys; grasps blocks
6–8 months Rolls supine and prone; sits unsupported; crawls belly to back; pulls to stand
9–11 months Cruises along furniture; stands briefly on own; takes initial steps independently
12–14 months Bear crawls; transitions from sitting to standing; begins to walk solo; develops pincer grasp
15–18 months Climbs stairs with assistance; runs short distances; stacks 2–3 cubes
19–24 months Runs steadily; uses step-to stair pattern; stacks 4–6 cubes; scribbles
2–3 years Balances on one foot; alternates stair steps; draws circles; strings beads
3–4 years Hops on one foot; kicks a ball; cuts straight lines
4–5 years Skips; balances for longer periods; draws squares; uses scissors safely

Imagine your baby lying on a soft blanket during tummy time, their little head lifting just a bit, it's a small win that sparks curiosity about reaching for toys. Each new skill marks a gentle step up in strength and coordination, making every day a new adventure.

Some toddlers, by age 2, might already be balancing on one foot, turning an ordinary moment into an exciting exploration of their body’s capabilities! These early victories lay the groundwork for later skills like drawing with a crayon or handling scissors safely.

Every age group here gives you clear goals, making it easier to see how far your child has come, whether at home or in a clinical setting. Enjoy these moments, they’re simple, beautiful signs of growing up, and they make parenthood truly magical.

Strategies to Enhance Fine and Gross Motor Skills

img-3.jpg

Fine motor skills help little ones get a handle on activities that require careful hand-eye coordination. They’re all about those small, precise movements that turn everyday tasks into playful learning moments. For instance, you might fill a small bowl with colorful beads and invite your child to thread them onto a string. It turns playtime into a joyful skill-building adventure.

Here are six friendly ideas to support fine motor growth:

  • Encourage a tiny pincer grasp by letting your child pick up small bits like dried pasta or cereal.
  • Use a shoelace and some beads to create a simple threading game that boosts hand-eye coordination.
  • Turn snack time into a mini exercise by letting your child use a spoon.
  • Build little towers with blocks to help them develop both strength and precision.
  • Try out pegboard activities, which gently refine small muscle skills.
  • Invite them to play with clay, letting their fingers press, shape, and explore textures.

Gross motor skills are about using big muscles in the arms, legs, and core. They grow stronger through fun, active play in a spacious area. Imagine setting up a cozy home obstacle course where cushions become stepping stones, and the living room transforms into an exciting playground of movement!

Below are six playful ways to boost gross motor development:

  • Create a safe, active challenge at home with a simple obstacle course using everyday items.
  • Spark joy with a friendly ball-kicking game to enhance coordination.
  • Enjoy guided jumping activities like hopscotch that invite a gentle leap and a laugh.
  • Lay down a taped line as a balance beam for a bit of safe practice.
  • Encourage crawling games or a few gentle steps on stairs.
  • Dance together with playful moves and rhythmic steps to keep energy high.

Happy exploring and playing, each small move makes a big difference in your child’s growth!

Tools and Methods for Assessing Motor Progress

img-4.jpg

We can use tools like the Peabody Developmental Motor Scales (PDMS-2) and the Bruininks-Oseretsky Test of Motor Proficiency (BOT-2) to see how a child is moving and growing. Parents also play a big part by filling out Ages & Stages Questionnaires to share what they notice in their child’s daily routines. This mix of expert tests and parent observations helps us understand a child’s motor skills from a very young age.

Doctors and therapists also pay close attention during regular check-ups. They look at things like muscle tone, how reflexes work, and the overall smoothness of a child’s movement. They use simple checklists to see if a child is meeting the usual milestones for their age. Regular screenings not only show us how a child is doing now but also help catch any delays early on.

All this information helps decide if a child might need a visit with a physical or occupational therapist for extra help. Combining expert tests with hands-on observations gives families a clear picture of their child’s movement skills and offers practical tips and reassurance along the way.

Recognizing Red Flags and Starting Early Interventions

img-5.jpg

Noticing delays in a baby's motor skills is really about catching the little signs that might mean extra help is needed. For example, if a baby doesn’t lift their head during tummy time by 3 months or isn’t sitting steadily by 9 months, these are signs to keep an eye on. And if a child hasn’t started walking by 18 months or struggles with a pincer grasp, like hesitating to pick up a small toy, it might be a nudge to consider early support.

Early help such as physical or occupational therapy can make a big difference. Simple sensorimotor exercises using a foam balance board or exploring different textured surfaces can encourage movement and build sensory skills. Imagine a little one taking a careful step on a textured mat, it can feel a lot like a fun, playful game where every small win builds a stronger bond between feeling and movement.

Working closely with both parents and professionals is key. By setting small, achievable goals and checking progress often, everyone can work together to support your child’s development. If you’re seeing these signs, having a chat with your pediatrician about early interventions might be a good idea. Every gentle push towards progress is a supportive step on your child’s journey.

Home and Educational Activities to Support Motor Growth

img-6.jpg

This section is all about fun, planned activities that teachers can lead in the classroom. These ideas work well with the play you do at home and help kids build strong motor skills. They come as step-by-step guides that are easy to follow and perfect for group learning.

Here are seven ideas for activities in a structured setting:

  • Try a simple obstacle course that has clear stations. For example, set up little spots where kids crawl under a table or climb over a few cushions. A teacher can walk with each group through the course, showing what to do at every station.

  • Organize a block-building challenge with a fun theme. A teacher can ask the children to stack blocks in a pattern. This not only sparks problem-solving skills but also improves hand control.

  • Set up a drawing and sensory station. Provide big sheets of paper and chunky crayons, and let a teacher draw a simple pattern that the children can follow. It’s a creative way to boost fine motor skills.

  • Plan a movement game like a mini relay or a guided Simon Says session. A teacher can lead a short race where kids perform a certain move at each checkpoint. Step-by-step guidance makes it easier for everyone to learn new motor skills.

  • Run a craft project with clear, simple steps. For instance, a teacher might guide the kids through a safe scissors activity. This step-by-step method helps them build fine motor coordination nicely.

  • Introduce fun hand-eye drills where children toss soft beanbags into color-coded targets. Having a teacher direct the activity turns the drill into an engaging game that’s easy to measure and enjoy.

  • Create balanced routines with a teacher-led demonstration. Think of a brief yoga session where a teacher shows how to balance on a taped line or use a wobble board. This clear, step-by-step lesson makes learning balance both fun and safe.

Final Words

In the action, this article shines a light on motor development, detailing how babies grow from simple reflexes to deliberate movements. We explored clear milestones, fun activities to boost fine and gross skills, and useful tools for tracking progress. It’s all about simple steps, sensory play, and early action when red flags appear. Every tip shared supports ongoing growth in a warm, practical way. Small improvements lead to big achievements, so stay confident and keep celebrating each developmental win!

FAQ

What is the meaning of motor development?

The meaning of motor development refers to how muscles learn to work together, moving from reflexive actions in infancy to intentional, coordinated tasks as a child grows.

What are the three types of motor development?

The three types of motor development include gross motor skills for large body movements, fine motor skills for precise hand tasks, and neuromuscular coordination that links them.

What are the 5 motor skills?

The 5 motor skills often include locomotor skills, object control, balance, coordination, and fine motor precision, all of which play a key role in daily tasks and movement efficiency.

What is an example of motor skills development?

An example of motor skills development is a toddler using a pincer grasp to pick up small items, showing improved fine motor precision and growing hand-eye coordination.

How do gross and fine motor development differ?

Gross motor development involves large movements like walking and climbing, while fine motor development focuses on small actions such as drawing, picking up objects, and using utensils.

What are some examples of motor development products and resources?

Examples include printed milestone charts, handbooks, and PDFs that outline motor skills progress, helping parents and teachers track a child’s movement development easily.

What are the 4 stages of motor development?

The 4 stages of motor development go from the reflexive stage to early voluntary movements, then to coordinated actions, and finally to refined, purposeful movements.

What are the motor development stages?

Motor development stages refer to the sequential phases a child experiences—from basic reflexes in infancy to advanced, controlled movements—encompassing both gross and fine motor progress.

Gross Motor Skills Vs Fine Motor Skills Defined

0

Have you ever thought about how a baby’s tiny grip might help with their first steps? It’s amazing how even the smallest movements can build the path to bigger milestones.

When a baby learns to crawl or reach out with their hand, they’re not just moving, they’re strengthening their muscles and paving the way for balance and creativity later on. Every little grasp and step helps shape the way they grow.

Let’s take a closer look at how these actions connect. Big moves build strong muscles, while careful hand tasks fine-tune coordination. Together, they create little moments that add up to big changes in a child’s journey.

Grasping the Differences: Gross Motor Skills vs Fine Motor Skills

img-1.jpg

Motor skills help us do everyday tasks. Fine motor skills use small muscles in the hands and arms to do things carefully. Think about turning a doorknob or using a fork at mealtime. Even holding a pencil with a neat, tripod grasp, which often happens when kids are a bit older, shows how much control these skills need.

Gross motor skills, on the other hand, use the big muscles in our arms, legs, and body. These skills let us crawl, stand, and walk. Imagine a baby starting to crawl within the first few months, taking a few brave steps as a toddler, and then trying out fun activities like walking on a balance beam around preschool age. Each step builds strength and coordination in a really natural way.

Simply put, fine motor skills let us do careful tasks like buttoning a shirt or drawing pictures, while gross motor skills help with bigger movements like running, jumping, or climbing. Both types are important for a child’s growth. Sometimes, it’s fun to think about how little actions come after learning big movements, like building a strong foundation first before practicing the finer details.

Developmental Milestones Across Ages for Gross vs Fine Motor Skills

img-2.jpg

When babies are born, they start showing little hints of muscle control. In those very first 3 months, you might notice them waving their arms around and sometimes bringing their hands together. It’s like a tiny preview of the skills they’ll develop later.

As they grow into the 3–6-month range, you’ll see them holding their hands together a bit longer, reaching out, and trying to grab things. It’s heartwarming to watch how they slowly learn to interact with their world.

Around 6–9 months, many babies can sit with a little extra support and even squeeze a rattle. They also start moving toys from one hand to the other, which shows that their brain and muscles are working together better each day.

Between 9 and 12 months, you might catch your little one flipping through the pages of a book, even as they work hard to pull themselves up to stand. This mix of big body movements and careful hand-eye coordination is a delightful sign of growth.

Once your child hits the 12–24-month stage, they’re usually more independent. Whether they’re cruising around furniture or using a spoon (sometimes with a little spill here and there), they’re mastering both large movements and delicate tasks like holding a crayon.

By the time children reach 4–5 years, you can see even more polish in their skills. They might balance on a beam with confidence, use scissors to cut shapes, and hold a pencil just right with a tripod grasp. It’s a lovely reminder of just how much progress they make with each passing day.

Age Range Gross Motor Milestone Fine Motor Milestone
0–6 months Crawling, sits with support Reaches for objects
6–12 months Pulls to stand, cruises Grasps small items, flips pages
12–24 months Walks, runs stiffly Scoops with spoon, pincer grasp
2–3 years Jumps in place Scribbles, stacks blocks
3–4 years Pedals tricycle Strings beads, cuts paper
4–5 years Balances on beam Tripod pencil grasp, ties shoelaces

Play-Based Activities to Support Gross and Fine Motor Skill Growth

img-3.jpg

Play-based activities let little ones learn new moves in a fun and natural way. At 6 to 12 months, you can set up a cozy space by placing a favorite toy just a little out of reach. Your baby might stretch to grab it, which helps build crawling (big movements) and reaching or grasping (small hand skills). Really, it makes playtime exciting while encouraging development.

When your toddler is 1 to 2 years old, try giving them push or pull toys and soft balls. These toys are great because they invite your child to move their body and work on hand coordination. Imagine a soft ball traveling from one hand to the other, each pass is a mini exercise for both strong big movements and refined touches.

As your child grows into the 2- to 3-year phase, ride-on toys can make a big difference by getting their legs moving. Adding a twist like stringing large beads can also boost finger coordination. Kids really light up when they see how play helps them control their bodies. Then, from 3 to 4 years, creating a small obstacle course lets them jump and balance while a simple puzzle works on pincer control. It might be a little setup in the backyard or even in the living room, with soft objects to jump over and cones to weave between.

By the time they reach 4 to 5 years old, games like hopscotch or riding a tricycle are full of fun and help build endurance with larger muscle moves. At the same time, activities such as scissor-cutting or playing with playdough polish their fine motor skills. Each activity mixes big movements and delicate touches so that every play moment counts, keeping both learning and fun on track.

Spotting Developmental Delays and Seeking Intervention for Motor Skills

img-4.jpg

Sometimes kids meet their milestones just fine, but if a few seem to be missing, it might be time to take a closer look. For instance, if a baby isn’t rolling over by 6 months or beginning to take steps by 18 months, it could be a hint that a little extra help may be useful. Even if a child hasn’t developed a neat tripod grasp (using the thumb and two fingers) by age 5, it might be a sign they could benefit from some added support.

Parents and caregivers can learn a lot by watching everyday activities. Have you ever noticed your little one avoiding moves that need balance or fine hand control? Paying close attention to these moments is important because getting help early can make a big difference. A caring pediatric occupational or physical therapist can gently check muscle strength, coordination, and even how your child senses touch, all in a supportive and friendly way.

Sometimes, joining a group activity can really boost a child’s skills. Programs like gross motor playgroups or fine-motor workshops not only work on specific delays but also help build overall movement and control. One play session might include fun balance games, while another might feature simple crafts that encourage careful hand movements. By starting early, you’re giving your child that extra push to reach each milestone with growing confidence.

Incorporating Motor Skill Practice into Educational and Home Routines

img-5.jpg

Every day, you can easily mix in movement exercises that help kids use their big muscles and fine-tune their little hands. Imagine starting the day with a fun stretch-and-move break at school that gets everyone’s hearts going, or a cozy corner filled with colorful beads and blocks where play naturally turns into learning.

At home, even small daily tasks can become playful learning moments. For example, you might let your child pour water from one cup to another, which gently builds hand-eye coordination and balance. And when they run or jump outside, it’s all about using big muscles and exploring their world in a lively way.

You can also design a special arts corner where your little one can paint with brushes or have fun with sticker crafts. These activities help refine their grip and control. And family game time, with catch-and-throw sessions or a round of Simon says, is a wonderful way to bring everyone together while boosting physical skills.

Setting Activity
Classroom Stretch-and-move breaks, play stations with blocks and beads
Home Pouring water for coordination, outdoor play for big-muscle fun
Arts Corner Painting with brushes and sticker crafts to strengthen grip
Family Time Games like catch-and-throw and Simon says to encourage movement

These simple, everyday practices not only help kids grow more mobile and independent, but they also set a strong foundation for learning. Isn’t it amazing how a little activity can make such a big difference in their day?

Final Words

In the action, we examined the differences between gross motor skills vs fine motor skills and how both help children grow stronger every day. We looked at key milestones, playful activities, and ways to blend practice into daily routines. We also discussed signs that might call for extra support from professionals. Every small step builds confidence and well-being. With plenty of engaging strategies at your fingertips, remember that each moment of play fuels growth, bringing joy and progress to every family.

FAQ

What are gross motor skills examples?

The examples of gross motor skills include crawling, walking, running, jumping, and balancing. They use large muscle groups, helping young children build strength and coordination.

What are fine motor skills examples?

The examples of fine motor skills include picking up small objects, drawing, using utensils, and turning doorknobs. They use small hand muscles to build precision and coordination in early development.

What are the differences between fine motor skills and gross motor skills?

The differences between these skills are that gross motor skills use larger muscles for whole-body movements, while fine motor skills use smaller muscles for tasks like writing and buttoning clothes.

What are five fine motor skills?

The five fine motor skills include grasping objects, manipulating small items, drawing, using eating utensils, and turning pages. These activities help children strengthen coordination and dexterity.

What are the five types of gross motor skills?

The five types of gross motor skills include crawling, walking, running, jumping, and balancing. They engage big muscle groups to support wider body movement and overall physical growth.

Is throwing a ball a fine or gross motor skill?

Throwing a ball is a gross motor skill because it uses large muscle groups in the arms and body, playing a key role in overall physical development.

Fine Motor Skills Ignite Bright Growth

0

Have you ever noticed how a tiny movement can open up a whole new world? Imagine a little one holding a crayon, slowly figuring out the best way to grip it. These small actions, what we call fine motor skills (simple movements that build muscle memory), help a child gain more confidence and independence.

When a child learns to tie a shoelace or pick up a small toy, it marks an important step in their growth. In this piece, we'll explore how these gentle motions set the stage for bright progress, turning everyday tasks into stepping stones for a successful future.

Understanding Fine Motor Skills: Definition and Key Components

img-1.jpg

Fine motor skills are all about controlling the tiny muscles in your hands and wrists. They help us write, tie shoelaces, button up a shirt, or pick up little objects. Think about a child learning to hold a crayon properly. Their growing control of the crayon shows how these skills develop, which is pretty amazing when you think about it.

These skills are built from several important parts. For instance, bilateral coordination lets both hands work in harmony, like clapping or holding a plate with one hand while slicing with the other. Pinch and grip strength help you hold things firmly, whether you're using a fork or buckling a seatbelt. Finger isolation means you can move one finger at a time, which comes in handy when you need to press just the right button on a remote. Thumb opposition, when your thumb touches your other fingers, is crucial for holding and using items smoothly.

Also, the arches in your hand, running side-to-side and lengthwise, play a big role. Imagine a sculptor gently shaping clay, the steady, delicate movements matter a lot. Each muscle in your hand has a role, working together to give you the dexterity for everyday tasks. These little actions build your independence and boost your confidence, one tiny movement at a time.

Fine Motor Skills Ignite Bright Growth

img-2.jpg

Infancy Fine Motor Milestones

When babies are very little, their hands work mostly by reflex. At first, they automatically grip objects, almost as if it’s magic. But pretty soon, you notice them reaching out with curious little hands for a dangling toy. This shift from a simple, automatic grip to a more intentional movement shows early learning, as they start to connect what they feel when they move their hands.

Toddler Fine Motor Milestones

As babies become toddlers, their hand movements become a bit more careful and controlled. The rough, early grip turns into a neat pincer grasp, like using just their thumb and finger to pick things up. Toddlers begin flipping through storybooks, turning pages with their tips. They even start feeding themselves with a spoon. Think of that sweet moment when a little one carefully places a sticker on paper, each deliberate move builds both their coordination and a sense of independence.

Preschool Fine Motor Milestones

By the time children are preschoolers, they’re ready for even more detailed tasks. They learn to cut paper with scissors, draw simple shapes, and button up their clothes almost on their own. Handling small building blocks during play shows off their growing skill. Imagine a preschooler happily working on a puzzle, their bright eyes focused on each piece. It’s a joyful progress, and parents can always give a gentle check-in to make sure everything is moving along just right.

Fine Motor Skills Exercises and Activities by Age Group

img-3.jpg

Infant Activities

For our little ones, simple finger-play games are a gentle way to boost early grasp and sensory skills. Try using soft, textured toys while guiding their hands so they can reach, grab, and explore. Imagine slowly moving a cuddly toy just within reach, it makes playtime fun and helps build those tiny muscles.

Toddler Activities

Toddlers love to explore and learn through play, and mixing in some self-feeding with fine motor practice works wonders. Think about letting them use little tongs or tweezers to pick up small objects, or even threading beads on a string. A bowl of bite-sized finger foods not only encourages them to eat on their own but also helps improve their coordination. And why not throw in some fun pencil control worksheets or games where both hands work together to build that focused precision during play?

Preschool Activities

As preschoolers grow, they’re ready for activities that refine their hand-eye coordination even more. Engage them with fun tasks like stringing colorful beads, cutting simple patterns with child-safe scissors, or working on lacing cards. Each activity offers a chance to practice a careful grip while also following the evolving occupational therapy guidelines. It’s a playful way to nurture precision and creativity as they explore new skills.

Occupational Therapy Strategies for Fine Motor Skill Improvement

img-4.jpg

Occupational therapists work gently to find where a child might have trouble with hand strength and smooth finger movement. They often begin by watching how a child holds a pencil or uses a spoon. Sometimes, a simple activity like doing a puzzle or tracing a picture helps the therapist see how well the child’s fingers work together.

Grip exercises are a big part of therapy. Imagine a child repeatedly tracing a shape on paper, each line helps guide their hands to be steadier. Using fun tools like therapeutic putty adds play to exercise. Squeezing, stretching, and molding the putty acts like a mini workout for tiny fingers.

Some children need a little extra support, and that’s where adaptive tools come in. Crayons or pencils with special grips can help them feel secure while practicing. There are also fun games that use both hands to coordinate, making practice feel like play. These activities build strength, spark confidence, and help little ones become more independent.

  • Pencil practice routines
  • Fun putty exercises
  • Specially designed grips

All these methods come together in a playful setting where every small step of progress is celebrated.

Fine Motor Skills Enhancement Tools and Resources

img-5.jpg

It looks like many kids today might be using their hands less for play because screens are taking over. Research suggests this could be affecting their fine motor skills, but there are lots of fun resources to help make practice a playful adventure.

One favorite tool is grip-strengthening putty. This squishy material isn’t just fun to play with; it also helps build up finger strength as children press, pull, and shape it. Picture a little one carefully molding the putty into a tiny sculpture, every squeeze is a gentle workout.

Another great option is using puzzles with small pieces. These puzzles challenge kids to work carefully and plan each move. As they fit pieces together, they boost hand coordination and feel proud of each tricky section they complete.

Interactive dexterity games are also a hit. Many come as apps with step-by-step fun challenges that feel like a game. They guide children through little tasks that help improve the accuracy of their movements.

Printable practice sheets are a simple and handy resource too. Parents and teachers can use them for tracing, cutting, and drawing activities at home or school. They offer a clear way to check progress and help build essential skills.

Tool How It Helps
Grip-Putty Builds muscle strength and hand control
Puzzles Boosts problem-solving and coordination
Printable Sheets Helps practice tracing and cutting skills

These tools and resources work well both at school and at home, letting every child see their progress in a fun and engaging way.

Assessing and Tracking Child Fine Motor Skills Progress

img-6.jpg

Keeping track of your child's fine motor skills can be really simple. You might start with a checklist or a chart that shows milestones. By noting down little wins, like improvements in handwriting, feeding themselves, or getting dressed, you can see how they’re growing. For example, one day you might write down that your little one did a tracing activity on their dexterity worksheets, showing how their hand control is getting better.

Simple methods, like using guides for manual activities, can work wonders over time. Picture yourself jotting a note after a fun session of finger-picking practice: "Today, Jamie buttoned his jacket with more care." This little record helps you see when they might need extra help or when it's time to try something a bit more challenging.

Child hand control assessments can mix everyday observations with targeted worksheets. Here are a few easy ideas to help you keep track:

  • Make a checklist that focuses on skills such as holding a pencil, cutting with scissors, and dressing.
  • Use milestone charts to see how your child’s progress compares with what’s typical for their age.
  • Try worksheets that help with tracing and cutting so you can see improvements in a hands-on way.
Tool Purpose
Observation Checklist Records day-to-day skill improvements
Milestone Chart Tracks developmental benchmarks
Practice Worksheets Measures progress in tracing and cutting tasks

Final Words

In the action of exploring fine motor skills, we looked at what they are, how they develop, and the playful exercises that help build strength. We talked about early milestones, hands-on support from professionals, and helpful tools and resources that add a practical touch. Tracking progress with simple checklists lets us see every little win. It’s amazing how a few fun activities at home can boost delicate fine motor skills and bring more confidence to everyday moments.

FAQ

FAQ

What are fine motor skills toys?

Fine motor skills toys help children build small hand muscles through play. These toys, like puzzles, bead stringing sets, and mini building blocks, promote gripping, precise movements, and better overall dexterity.

What is the difference between gross and fine motor skills?

Gross motor skills involve large muscles for movements such as running and jumping, while fine motor skills use small muscles in the hands for activities like writing, buttoning, and manipulating small objects.

What is a good example of a fine motor skill?

A good example of a fine motor skill is tying shoelaces. This task requires precise finger movements, hand coordination, and gentle strength, similar to writing or using utensils.

What are some fine motor skills activities?

Fine motor skills activities include bead threading, drawing, using tweezers to pick up small objects, and playing with playdough. These exercises help build hand strength and improve control.

How do fine motor skills relate to writing?

Fine motor skills relate to writing by enabling precise pencil grip and controlled finger movements. These skills are essential in forming letters, guiding the pencil, and ultimately producing neat handwriting.

What is included in a fine motor skills list?

A fine motor skills list often features tasks such as cutting with scissors, buttoning clothes, writing, drawing, and handling small objects. These actions showcase the dexterity and control needed in daily routines.

What is the opposite of fine motor skills?

The opposite of fine motor skills is gross motor skills, which involve using larger muscle groups for actions like running, jumping, and balancing rather than detailed hand movements.

How does occupational therapy help with fine motor skills?

Occupational therapy helps improve fine motor skills through playful exercises like pencil drills, putty work, and adaptive tool use, which strengthen hand coordination and increase independence in daily tasks.

What are five important fine motor skills and what are the big six?

Five key fine motor skills include grasping, cutting, writing, buttoning, and self-feeding. Often, a broader list adds drawing and utensil use to cover a more complete range of fine motor tasks.

Gross Motor Skills: Boosting Confidence In Children

0

Have you ever wondered if your little one’s first crawl might spark a lifetime of confidence? When a baby starts crawling, walking, or reaching out, it’s more than just moving around. They are building a strong base for trusting in their own abilities. As they learn to control their arms, legs, and body, they begin to believe in themselves. This post shows how everyday movements help boost their confidence and ready them for new challenges. Even small wins in these growing skills can make a big difference in how they see what they can do.

gross motor skills: Boosting Confidence in Children

img-1.jpg

Gross motor skills are all about the big muscles in our kids' bodies – think arms, legs, and torso. These skills help them do everyday tasks like crawling, walking, and even simple jobs such as raking leaves. When little ones start moving their arms and legs and learning how to control their bodies, they're really building a strong base for not just physical activity but also for figuring out the world and feeling good about themselves.

It all starts when babies are very young and continues right through their preschool years. Picture a baby during tummy time: turning their head, stretching out their arms, and even wiggling helps make their neck and arm muscles stronger. Before a baby takes those first steps, they spend lots of time practicing these tiny movements. And every time they master a new skill, they feel a bit more confident and ready to face the next fun challenge.

Every child grows at their own pace. Some might roll over fast while others need a little extra time to crawl or stand. This difference is natural – a delay in one area doesn’t mean there’s a problem. What really matters is that daily play and activities encourage them to move. When a child sees themselves mastering something new, it boosts their belief in what they can do and makes them eager to try something even more exciting during playtime.

Parents and caregivers can support this by creating safe areas for physical play. Making everyday movements into fun, little adventures not only builds strength but also helps kids grow in confidence, one joyful step at a time.

Gross Motor Skills Development Timeline and Milestones

img-2.jpg

Watching your little one hit big movement milestones can feel like cheering on a series of small victories. In the first few months, babies start to show real control with their head and arms. Each little win sets the stage for more independent moves later on. And as your baby experiments with their body, they're also figuring out how to interact with the world in fun, new ways.

Every new step brings not just a physical change but a boost in confidence that invites even more playful moments. You might notice that as your baby moves from needing help to sitting up by themselves or when they pull up to stand and cruise along the furniture, they start to trust in their abilities more and more. These early experiences pave the way for confident walking, early running, and eventually, more coordinated actions like hopping or skipping. Remember, while these milestones usually follow a general timeline, every child is unique, and that’s perfectly okay.

Age Group Typical Gross Motor Milestone
0–3 months Begins to show first voluntary head and limb movements
3–6 months Starts rolling from back to side, then from back to belly and belly to back
6–9 months Moves from needing support to sitting up on their own while using their hands for balance
9–12 months Pulls up to stand and begins cruising along furniture
Around 1 year Takes first independent steps while holding onto objects or a caregiver’s hand
2 years Walks confidently and starts early running, even if there are a few tumbles
3 years Can stand on one foot briefly and may even start pedaling a tricycle
4 years Begins hopping on one foot with improved balance and coordination
5 years Skips, gallops, and shows more advanced coordination

Noticing these steps means you're celebrating progress while staying tuned in to see if any extra help might be needed. Isn't it amazing how each small movement can make a big difference in building up your child's confidence and joy in moving?

Engaging Activities to Strengthen Gross Motor Skills

img-3.jpg

Watching kids play active games is a joy. It helps them build strength in their big muscles while sparking happiness and boosting confidence. Imagine a baby during tummy time, switching head turns not only strengthens their neck but also lights up their face when they see a favorite toy nearby.

For babies, try helping them alternate head turns during tummy time to build neck strength.
For toddlers, encourage a little running or walking in a safe play area or on the grass.
For preschoolers, set up a playful obstacle course with soft cushions, tunnels, and low hurdles to practice balance.
For all ages, simple ball games like rolling, catching, and kicking can improve arm and leg coordination.
For all ages, add animal walks such as the bear crawl to build core strength.
For all ages, the crab walk is a fun way to boost the coordination between arms and legs.
For all ages, consider a dance session with gentle rhythmic movements so kids can feel the beat and have fun moving.
And even indoors, you can create active play routines using common household items, like making a mini balance beam or stepping stones.

These fun activities turn everyday play into a chance for kids to build their motor skills and confidence. They become small steps toward growing independence while enjoying every moment.

Monitoring and Assessing Gross Motor Skill Progress

img-4.jpg

You can easily see how your little one is doing by simply watching them play every day. A handy checklist that includes head control, rolling over, sitting, standing, walking, running, hopping, and skipping can help you keep track. When you spot your child shifting their weight confidently or balancing well during play, it's a clear sign that they're making great progress.

For example, when your baby finally sits up on their own after several tries, it shows they’re growing stronger. Notice little changes in their balance and posture, as these moments often mean they’re gaining confidence in their movements. If you find that your child isn’t sitting by 9 months or walking by 18 months, it might be time to chat with your doctor. They can point you towards early motor assessments, and sometimes working with a physical or occupational therapist can make a big difference.

Taking a few weeks to observe your child regularly helps you see patterns in their progress. This way, you can decide when it might be a good idea to seek a bit more professional support.

Structured Programs and Play-Based Strategies for Gross Motor Skills Development

img-5.jpg

Movement classes for little ones turn exercise into play, helping kids build strength and coordination in a really fun way. In these classes, caring instructors lead children through easy-to-follow activities that sharpen their body awareness and control. Imagine a class where kids hop, jump, and crawl through a small obstacle course, all in a warm, accepting group.

School exercise games bring gross motor skills to life. Think of relay races where children team up, or playful obstacle courses where they zigzag and hop over safe, soft hurdles. These fun challenges boost balance and coordination while making every child feel part of a supportive team.

Play therapy sessions transform imaginative games into chances for motor growth. In these sessions, kids might pretend the play area is a jungle gym or a race track, which gets them moving all over and helps build their confidence.

Dance and rhythm activities are another wonderful idea. When children sway to music, twirl, or step in time, they learn about timing and coordination. This playful movement helps make everyday tasks easier while letting kids enjoy every moment.

Together, structured programs and creative play strategies create a lively, nurturing space. Each activity is designed as a gentle challenge and a delightful adventure, so every little learner can feel confident as they explore and master their growing motor skills.

Tips for Parents and Educators to Support Gross Motor Skills Growth

img-6.jpg

Every day, carve out some time for active play that isn’t strictly scheduled. Set up a safe, little corner at home where your child can run, jump, or simply explore at their own pace. This free play isn’t just fun, it helps build their confidence and boosts their movement skills.

Get creative with everyday items you have around the house. You might turn a laundry basket into a fun climbing challenge or arrange pillows on the floor as stepping stones. Imagine this: a pile of soft cushions becomes a mini obstacle course where every step is a fun win.

Encourage your child to explore by walking on different surfaces. One day, take a leisurely stroll on the grass, and on another day, let them discover the cozy feel of a carpet. These varied textures help connect their senses in a simple, effective way. And when you see them trying something new or balancing on one foot, celebrate that moment with a cheerful “Great job!” or a playful high-five. These little celebrations transform every effort into a precious milestone that motivates them to try again.

Final Words

In the action, we explored what gross motor skills are and why every step matters, from rolling and crawling to running and playful activities. We broke down typical milestones, practical ways to build strength through fun exercises, and tips that help parents support every developmental phase. Each activity gives room for growth and little wins along the way. Every small movement adds to a brighter, more confident step for your child, reminding us that nurturing these skills creates a joyful, active future.

FAQ

What are gross motor skills toys?

Gross motor skills toys encourage activities like running, jumping, or climbing. They include items such as ride-on cars, tricycles, and play structures that promote balance, strength, and overall body coordination.

What are fine motor skills examples, and what are five fine motor skills?

Fine motor skills involve using small muscles in the hands and fingers. Examples include using utensils, drawing, building with blocks, buttoning shirts, and picking up small objects.

What are gross and fine motor skills?

Gross and fine motor skills refer to two movement types. Gross skills involve larger muscles for whole-body actions like walking, while fine skills focus on precise movements with hands and fingers.

Which is an example of a gross motor skill?

An example of a gross motor skill is running. This activity uses major muscle groups to promote strength, balance, and coordination in a child.

What are some gross motor skills activities?

Gross motor activities include playing catch, riding a bike, and climbing on play structures. These activities help children build overall strength, balance, and coordination.

How do gross motor skills develop in early childhood?

Gross motor skills development starts with basic movements like crawling and progresses to walking, running, and jumping. Early childhood is critical for building strength and coordination through everyday play.

What are the five types of gross motor skills?

The five types generally include locomotor skills (walking and running), non-locomotor skills (balancing), object control skills (throwing and catching), strength-based skills (jumping), and coordination-focused skills.

8 Month-old Feeding Schedule: Happy Daily Meals

0

Have you ever thought that your baby's mealtime could be fun instead of just another tick of the clock? With our friendly, flexible plan, you can add a little more joy and balance to your 8‑month‑old’s meals. We blend easy milk feedings with a couple of solid meals spread out over the day. Even small changes can turn mealtime into a gentle, happy routine. From that first morning milk to a soothing bowl of cereal and milk later on, this guide offers a caring approach that truly respects your baby's unique needs.

8 month-old feeding schedule: Happy Daily Meals

img-1.jpg

This guide is a warm, flexible plan to help you set up a balanced feeding routine for your 8-month-old. It shows a mix of milk feedings and two solid meals spread out over the day, usually every 3 to 4 hours. Breastmilk or formula stays the main source of nutrition while purees and soft table foods add yummy variety for exploration. Most 8-month-olds drink around 24 to 32 fluid ounces daily over 4 to 6 feeding sessions.

Time Feed Type Portion
7:00 AM Breastmilk/Formula 6 oz
9:30 AM Fruit Puree 2 Tbsp
12:00 PM Breastmilk/Formula 6 oz
2:30 PM Vegetable Puree 3 Tbsp
5:00 PM Breastmilk/Formula 6 oz
7:30 PM Cereal + Milk 3 Tbsp cereal + 4 oz

Remember, every little one is unique. You might need to tweak the plan to match your baby’s hunger signals and sleep times. Some babies may need more frequent feedings, especially during growth spurts, while others do just fine with this routine. Trust your instincts and keep an eye on your baby's cues, it's all about finding what works best for your family. If you ever have concerns, chatting with your pediatrician is a great idea.

Portion Sizes and Meal Frequency for an 8-Month-Old

img-2.jpg

At eight months, your baby usually eats about four to six times each day. This routine includes two meals of solid food. Milk feeds are about 6 to 8 ounces, and solid servings start at 2 to 4 tablespoons before slowly increasing to about 1/4 to 1/2 cup. For instance, a small serving of vegetable puree at lunch brings a bit of variety without making things too complicated.

During growth spurts or when your baby’s appetite changes, you might need to tweak the amounts a little. Trust your baby’s signals and feel free to adjust the milk and solids as you go. This keeps the feeding routine balanced and easy to manage.

Balancing Solid Foods with Milk Feedings in an 8-Month-Old Schedule

img-3.jpg

Milk is still the star of your baby’s diet. It gives the energy needed for growing and exploring new tastes, kind of like that friend you can always count on. Its familiar flavor wraps your little one in comfort while trying out new foods.

After a milk feed, try adding a little solid food to gently open up a world of new flavors. Start with one simple meal, a fruit or veggie puree. For instance, a spoonful of mashed banana right after a warm milk feed can be a nice treat. Later in the day, you can offer a second, light solid meal to keep things balanced without taking away from the milk.

When your baby seems extra hungry or goes through a growth spurt, it might be time to adjust the milk feeds. If your baby signals hunger soon after eating solids, you can add a bit more milk and slowly introduce a few different solids. Trust your instincts and watch carefully, if your baby still seems a bit fussy or unsatisfied, a little extra milk or a longer solid meal could do the trick.

Advancing Food Textures and Finger Foods for Your 8-Month-Old

img-4.jpg

As your little one gets more at ease with purees, it might be the perfect time to try out some new food textures that invite self-feeding. Think of this as a gentle adventure where each bite introduces a new feeling, all while keeping things safe and fun.

Purees to Mashed

Start by moving from fully smooth purees to a slightly mashed style. Imagine turning a smooth soup into a thicker, heartier stew, your baby will slowly enjoy the tiny lumps and new sensation. A simple tip: lightly mash fruits or veggies until they're not completely smooth, and let your baby discover these new textures bit by bit.

Soft Chunky Textures

Once your baby gets comfortable with mashed foods, try adding in a few small, soft lumps. This means offering mashed fruits or veggies with a few extra nubby bits that are perfect for gentle chewing. Keep the pieces small and soft, so your baby can easily gum them without any fuss. It’s all about giving them a little extra to explore.

Finger Food Introduction

Now for the fun part, finger foods! Think about soft banana cubes, avocado pieces, or even tender pasta shapes that fit right in tiny hands. Always keep a close eye on your baby as they try these out, making sure everything is soft enough to avoid any choking worries. You might even say, “Here are some bite-sized foods just for you,” turning it into a playful, engaging moment.

Remember, patience is your best friend during this change. Some days might be a bit messier than others, but every little meal is a step toward building new skills. Keep trying different textures and sizes, and trust that with your gentle guidance, your baby will happily adjust to these exciting new experiences.

Key Nutrients and Food Choices for an 8-Month-Old

img-5.jpg

At 8 months, iron really matters in your baby's diet. You can help by serving iron-rich foods like fortified baby cereal, pureed meats, and beans. For example, mixing a little spoonful of cereal with milk or water is a soft and simple way to add iron. These choices boost your baby’s energy and blood health while making meals a fun chance to try new tastes.

Vitamin-filled fruits and vegetables are also important. Think about adding sweet potatoes, peas, or apples to the mix. These foods provide vitamins A and C, which help keep your baby's immune system strong and support cell repair. A small portion of mashed apple or steamed peas is a sweet and gentle way to introduce new textures.

Protein is another key part of these meals. Soft proteins like pureed chicken, well-cooked lentils, and even a bit of yogurt if dairy is okay can help build strong muscles. When you start with allergenic foods such as thinned peanut butter or egg, try one food at a time and wait 3 to 5 days before trying something new. This careful, step-by-step approach helps you spot any reactions while keeping your baby’s menu safe and varied.

Recognizing Hunger and Fullness Cues in Your 8-Month-Old

img-6.jpg

When your little one is ready to eat, you might see them reaching out for the spoon or opening their mouth like they're saying, "I'm hungry!" Sometimes, they might even get a little fussy around mealtimes. This fussiness is a gentle hint that it's time for a meal, rather than sticking to a strict schedule. Trust that these natural signals help you know when your baby is ready for their next bite.

On the flip side, when your baby is full, they’ll let you know in a sweet, clear way. They might turn their head away, push the food aside, or simply slow down as they become content. Keeping a close watch on these cues, along with regular check-ups, makes it easier to adjust meal portions and timing to perfectly fit your baby’s needs.

Establishing Safe, Structured Mealtime Routines for an 8-Month-Old

img-7.jpg

Begin by creating a warm, safe space where your baby feels truly at home during mealtime. Set up a strong, secure highchair that keeps your little one comfortable. Keep spoons, bibs, and cups nearby, just like setting up a little station where everything has its special spot, much like you would arrange your favorite dishes before a family dinner.

Sharing meals together isn’t just about filling bellies, it’s also a time to gently show how to enjoy food and socialize. When your baby sits with you, they naturally learn how everyone else enjoys their meal too. And yes, there might be some mess! Using a washable mat under the highchair and bibs that are easy to wipe clean can turn cleaning up into a simple and even fun routine.

Sticking to mealtime schedules really helps support your baby’s digestion and teaches them to recognize when they’re hungry. Try to keep mealtimes consistent each day, and feel free to tweak the schedule if it works better for your family. A regular routine lets your baby know what to expect and adds a sense of comfort to every meal.

Final Words

In the action, this guide walked through a clear daily plan that blends milk feedings with two solid meal times, advises on portion sizes, and shares tips for easing into new food textures. It also reminds us to keep watch for our little one’s hunger and fullness signals.

Keep this 8 month-old feeding schedule as a flexible guide as you adjust to your baby’s unique needs. Every day offers a fresh chance to tune into your child’s cues and enjoy mealtime together.

FAQ

Q: What is an 8-month-old feeding schedule with solids, whether using formula or breastfeeding?

A: An 8-month-old feeding schedule with solids combines 4–6 milk feeds daily (breastmilk or formula) with two solid meals spaced 3–4 hours apart, ensuring a balanced intake as your baby grows.

Q: How do feeding schedules vary for 7-, 8-, 9-, and 12-month-old infants?

A: Feeding routines adapt as babies grow. A 7- or 8-month-old typically has 4–6 milk feeds with 2 solid meals, while 9- and 12-month-olds may gradually incorporate more table foods and possibly reduce milk feeds as they explore a broader diet.

Q: Where can I find an 8-month baby food chart PDF?

A: The 8-month baby food chart PDF offers a visual guide to meal portions and timing, and it is available online from trusted parenting resource sites for easy download and reference.

Q: How often should you feed an 8-month-old baby?

A: Feeding an 8-month-old generally involves 4–6 feeds a day, including milk and two solid meals, spaced regularly to match your baby’s natural hunger and wake times.

Q: What is the 5 3 3 rule for feeding an infant?

A: The 5 3 3 rule for feeding suggests a pattern where a baby enjoys about five milk feeds, three solid meals, and three healthy snacks throughout the day, though individual needs may vary.

Q: Is four bottles enough for an 8-month-old?

A: Four bottles might not meet an 8-month-old’s needs, as most require 4–6 milk feeds daily to reach the recommended total of 24–32 fl oz, so adjustments can be made based on your child’s cues.

Q: How many milk feeds does an 8-month-old typically need?

A: An 8-month-old usually needs 4 to 6 milk feeds daily, totaling around 24–32 fl oz, to support consistent growth and development while complementing two solid meals.

Infant Gavage Feeding: Safe, Expert Care

0

Have you ever wondered why some tiny babies get fed through a small tube? For little ones who aren’t ready to suck or swallow yet, tube feeding is like a lifeline. It brings the important nutrients straight into their tummy so they can slowly build strength.

In this chat, I want to explain how this safe feeding method works and how it helps bring comfort to both the baby and the family. Even when things seem really challenging, each little baby receives the loving care they deserve.

Understanding Infant Gavage Feeding Basics

img-1.jpg

Infant gavage feeding is a way to give a baby the nutrition it needs directly into its tummy through a small tube. It’s also called tube feeding (enteral nutrition), and doctors usually use it in the neonatal intensive care unit for preterm babies born before 32 to 34 weeks. These little ones sometimes can’t suck and swallow well, or they don’t yet have the muscle strength to feed by mouth. Often, families learn about this method when their newborn is too fragile to feed normally. The process usually starts in the hospital, and once the baby has stabilized, many continue tube feeding at home. It can be comforting to know that every step is handled with care and understanding.

Often, tube feeding is just a temporary help until the baby grows stronger and learns to feed by mouth. The tube, sometimes called a gavage tube, allows doctors to give the baby carefully measured amounts of milk, whether it’s fortified breast milk or preemie formula, ensuring the baby gets the vital nutrients needed for growth. Many moms have shared little challenges like their baby getting sleepy during feedings, a reminder that every bit of care in the NICU is thoughtfully adjusted to meet the baby's unique needs with both expertise and empathy.

As the baby starts to show signs of strength, the care team gently shifts from tube feeding to regular bottle or breastfeeding. This approach is key for making sure the baby gets the nutrition it needs until it’s ready to feed on its own. It’s amazing to think that many babies who begin with tube feeding eventually join in on family meals with joyful smiles, a truly special milestone in their recovery.

Indications for Infant Gavage Feeding

img-2.jpg

When little preemies have a hard time feeding by mouth, their care team might try gavage feeding to make sure they get all the nourishment they need safely. It’s like giving your baby a gentle helping hand while their natural feeding skills are still coming along.

Here are a few reasons why a baby might need gavage feeding:

  • Babies born before 32 to 34 weeks often haven’t yet learned the smooth rhythm of sucking and swallowing.
  • Sometimes, infants simply don’t have enough muscle strength to pull milk the way they should.
  • If a baby gets really sleepy during oral feedings, gavage can help keep things on track.
  • After using a feeding tube for a while, some babies might start to resist or feel uneasy about feeding by mouth.
  • And if a baby has stomach or esophagus troubles that make regular feeding risky, this method provides a safer option.

Gavage feeding is a careful way to support your baby’s growth during these delicate early days. By measuring each feed, whether it’s fortified breast milk or a special preemie formula, the care team makes sure your baby gets just the right amount of nutrition. This approach is only temporary, and soon enough, your little one will be ready to make the move to feeding by mouth more easily.

Procedure for Infant Gavage Tube Insertion

img-3.jpg

Doctors and nurses carefully insert the feeding tube in a very clean space to keep your baby safe from germs. First, they measure the tube starting from your baby’s nose or mouth. They follow a gentle line from the ear down to the middle of the chest (called the xiphoid process) to make sure the tube reaches the right place. Each tube has markers to help guide it gently and keep discomfort to a minimum.

During the process, the tube is slowly advanced along the chosen path. The caring team talks softly and keeps an eye on your baby’s reactions, making sure to ease any signs of worry. This gentle method helps keep your baby calm and comfortable, showing how much they value both safety and your little one’s well-being.

Orogastric vs Nasoenteric Routes

Sometimes the tube is placed through the mouth (orogastric route), especially if the baby’s nasal passages are a bit sensitive or congested. Other times, it’s guided through the nose (nasoenteric route) which can offer a steadier way to deliver the feed. Each route has its benefits, and the team chooses the best one to keep your baby comfortable.

To make sure the tube is in just the right spot, the team checks by testing the fluid’s pH and by listening carefully when they push a little air into the tube. This double-check keeps everything secure and safe during feeding.

Infant Gavage Feeding: Safe, Expert Care

img-4.jpg

When babies need gavage feeds (a method that uses a tube), we set them up at a gentle 30 to 45 degree angle. This small change helps them breathe easier and makes feeding time more comfortable. The care team carefully secures the tube with soft tape so it stays in place, all while watching the baby's heart rate, breathing, and overall ease. They might even offer a pacifier with a touch of sucrose to ease any brief discomfort, kind of like a warm, reassuring hug.

The whole process is done with extra care. Every step, from keeping the tube clean to checking its position, helps lower the chance of infection. Nurses and experts tune in to the baby's responses, making adjustments as needed. This thoughtful mix of science and gentle care shows parents that every detail matters, bringing both expertise and heart to each feeding session.

Potential Complications in Infant Gavage Feeding

img-5.jpg

Sometimes, feeding a baby through a tube can bring a few bumps along the way that might worry parents. Babies might get extra sleepy during a feed, which can make it harder for them to stay awake while they receive their nutrition. And a few little ones might start to dislike eating by mouth later on because they get used to the tube.

Many preemies also experience milk coming back up from their tummy, a condition called gastroesophageal reflux. In some cases, this can turn into something more persistent, known as GERD (a more regular and sometimes uncomfortable type of reflux).

There are also rare times when the tube might slip out of place or cause a bit of irritation around the nose area. This can sometimes lead to a small, localized infection near the tube site. When a baby feels a bit uneasy, a pacifier dipped in a little sugar can help calm them down. Most of these issues can be smoothed out with a few gentle changes in the feeding methods and careful attention from the healthcare team.

Transitioning from Gavage Feeding to Oral Feeding

img-6.jpg

When your baby starts showing little signs that they can handle a bit of feeding by mouth, it marks an exciting step away from tube feeding. Families team up with healthcare providers to create a gentle plan that fits the baby’s growth and little cues.

Timing and Readiness Criteria

Most babies ready for a mouth feed show steady weight gains, stronger muscles, and a more alert demeanor during feedings. You might see your baby really looking at you when offered a bit of milk, which feels promising. Doctors and nurses look at these signs along with medical advice to decide the perfect moment to try a little oral feeding, keeping your baby's comfort and safety in mind.

Typically, the process starts with very small amounts of fortified breast milk or a special formula made for preemies. Health experts watch every step carefully to see that your baby’s efforts line up with the plan. As your baby’s muscle strength and coordination improve, the tube feeds are gently reduced, nudging them toward a more natural way of eating.

Gradual Oral Feeding Strategies

One step-by-step method is to try paced bottle feeds or soft, gentle breastfeeding sessions with plenty of little breaks. By slowly cutting back on the tube, your little one gets the time and space to learn how to feed by themselves, which is a big leap toward becoming more independent at mealtime.

Final Words

In the action, we explored infant gavage feeding basics, from understanding why the method is needed for preterm infants to examining the clinical indications and safe insertion techniques. We talked about careful positioning during feeds and addressed ways to manage common complications. We also reviewed strategies for gradually shifting to oral feeding as babies grow stronger. Each point reminds us of the attentive care and support offered at every step of care. It’s a comforting reminder that every small step leads to healthy and happy beginnings.

FAQ

Q: What is gavage feeding for infants?

A: Gavage feeding for infants means delivering nutrients directly into the stomach using a tube. This method mainly supports preterm babies who aren’t yet able to feed well by mouth.

Q: How is the gavage feeding procedure performed?

A: The gavage feeding procedure involves a healthcare professional inserting a tube gently under sterile conditions and confirming proper placement by simple tests. It can be done manually or with a pump while nurses monitor the infant’s well-being.

Q: What is the difference between gavage feeding and NG tube feeding?

A: The difference is that both methods use tubes, but NG tube feeding is a type of gavage feeding. In practice, they often refer to the same process of administering nutrition when infants cannot feed orally.

Q: What are the common indications for starting gavage feeding?

A: Indications for starting gavage feeding include poor sucking ability, muscle weakness, infant sleepiness during feeds, and issues like gastroesophageal reflux that make oral feeding unsafe.

Q: Why would an infant need a G-tube or tube feeding?

A: An infant might need a G-tube because they cannot coordinate sucking or swallow properly. This feeding method ensures they receive nutrition until they develop normal feeding skills.

Q: What positioning is recommended during gavage feeding for safety?

A: The recommended positioning during gavage feeding is a 30–45° incline. This angle helps lower the aspiration risk and provides a safe, comfortable setup while the tube remains securely taped.

How To Wake Up Infant For Feeding Safely

0

Have you ever wondered if it’s safe to gently wake a sleeping baby? When it’s time to feed, knowing how to softly coax your baby from deep sleep can make a big difference. This guide is like a warm chat with a friend, sharing easy steps to create a quiet, calm space that helps your little one wake up slowly and safely. You’ll learn simple ways to ease them into wakefulness, keeping feeding time smooth and filled with care. Imagine a gentle nudge that feels just as tender as the loving hum of a lullaby at bedtime. Let’s explore these steps together and make feeding time a comforting moment for both you and your baby.

Gentle Methods to Wake Up Your Infant for Feeding

img-1.jpg

Waking a sleepy baby for a feeding can be soft and gentle. It’s all about setting up a calm space so your little one feels safe. A little bit of light stimulation helps them slowly come out of deep sleep without getting startled.

Try these ideas:

  1. Unsaddling – Carefully take off the swaddle so your baby feels a tiny change in temperature. For example, you might say, "Let’s take off the swaddle and feel that cool breeze, it might help you wake up a bit."
  2. Removing extra layers – Remove one extra piece of clothing to help your baby feel less wrapped up.
  3. Keeping the room cool – Cool the room just a little. A cooler space can naturally bring a sleepy baby to a more alert state.
  4. Gentle stimulation – A soft tickle on tiny toes or a gentle cool puff of air on their face can help. Sometimes even a slight tickle can bring a precious smile as they wake.
  5. Skin-to-skin contact – Holding your baby close not only keeps them warm but also fills them with your familiar scent and heartbeat, which can be very comforting and help them wake gently.

Babies can feed safely even if they’re not fully awake. Just keep a close eye for their feeding cues. Experts say it’s best to feed every 2 to 3 hours, or whenever your baby shows signs of hunger. These gentle ways help you keep a regular feeding routine while making sure your baby stays comfy and moves smoothly from sleep to wakefulness.

Infant Hunger Cues: Recognizing When to Wake for a Feeding

img-2.jpg

Newborns usually sleep about 15.5 hours a day, although every baby is different. It’s important to notice when your little one is moving from deep sleep into a lighter doze. Sometimes you might see tiny signs like gentle hand-to-mouth movements that suggest they might be ready for a meal soon.

Experts say it’s best to follow your baby’s hunger cues instead of sticking to a strict schedule. Look out for behaviors such as turning their head toward you, smacking their lips, or getting a bit fussy. These are your baby’s ways of saying, "I’m hungry!"

By paying attention to these gentle signals, you can help ensure that your baby gets fed at just the right time, supporting their healthy growth and keeping them cozy and happy.

Step-by-Step Guide to Wake Your Infant for Night and Dream Feeds

img-3.jpg

Sometimes you need to gently wake your baby at night for a feeding, and a caring, gentle approach can really help. When it’s time for an immediate feed, try removing your baby’s swaddle or a layer of clothing. This small change in temperature can serve as a soft signal that it's time to wake up. You can also dim the lights and play a quiet lullaby or soft white noise to keep things calm. A gentle touch, like a light stroke on the arm or a soft tickle, can be a sweet way to stir your little one awake without startling them.

Dream feeds are another helpful trick when you want to keep night feeds smooth and support longer sleep stretches later on. Hold your baby while they are still very sleepy, usually 2 to 3 hours after their bedtime feed (typically between 9:00 and 10:30 pm). Keep the room quiet and relaxed so your baby can easily make the switch to a full feed. This approach is usually a good fit from around four weeks old and can continue until about nine months. And if nothing seems to change after about 5 to 7 nights, it might be a good idea to try a different method.

Age-Based Wake-Up Strategies for Infant Feedings

img-4.jpg

Watching your little one grow is a special journey, and as they do, their sleep and wake patterns change. Early on, newborns sleep really deeply and might need a firm little nudge, like removing a swaddle or letting in a bit of a cool breeze, to help them wake up for a feed.

For babies up to about four weeks old, try using a stronger cue. Removing their swaddle or an extra piece of clothing and letting a tiny bit of cool air in can signal that it’s time for a feed. It’s like giving your baby a gentle reminder that they’re needed.

When your baby is between 1 and 3 months old, a gentle rocking or a soft pat on the back often does the trick. This tender, rhythmic touch works almost like a warm, inviting hug that helps them shift from sleep to wakefulness.

By the time your baby reaches 3 to 6 months, holding them for some skin-to-skin time while softly singing a favorite tune can be a beautiful moment for both of you. This calm and familiar sound not only comforts them but also encourages their little eyes to open gradually.

For older infants above six months, a bit of playful interaction, like a light tickle or cheerful talking, can be a fun way to bring them out of sleep. This gentle approach keeps things safe while letting your baby know that it’s time to start a new adventure together.

Safety Precautions and When to Consult a Pediatrician for Infant Wake-Ups

img-5.jpg

When it's time to wake your little one for a feeding, try to skip bottles or pacifiers at first. This helps keep breastfeeding on track. Instead, gently unswaddle them, remove an extra layer, or cuddle skin-to-skin. These soft, caring methods wake your baby without causing stress or disturbing their natural comfort.

Keep an eye out for any signs that your baby might not be getting enough nourishment. If your baby stays unusually sleepy, has fewer wet diapers, or starts losing weight, it could be a signal to take note. Yellowing of the skin (jaundice) or signs of an infection might also be why they’re extra drowsy. If you notice these issues or if your baby remains too sleepy during feedings, it’s best to call your pediatrician as soon as you can.

Final Words

In the action of caring for your baby, we explored gentle techniques to wake a sleeping infant for feeding. We discussed simple methods like unswaddling, soft touches, and adjusting the room's warmth. These tips help you recognize hunger cues and keep feedings safe.

With these steps, you now have clear guidance on how to wake up infant for feeding without causing distress. Enjoy these calm and nurturing feeding moments as you support your little one's needs.

FAQ

How do I gently wake a sleeping infant for feeding?

Gently waking a baby involves methods like unswaddling, removing extra layers, softly tickling their toes, or using skin-to-skin contact. These practices help encourage feeding without startling your baby.

What should I do if my baby is not waking up for feeding?

If a baby isn’t waking up for feeding, try gentle stimulation such as light tickling or softly rubbing. Monitor for signs like fewer wet diapers, and consult a pediatrician if the sleepiness continues.

Is it okay to wake a sleeping baby to feed?

Waking a sleeping baby to feed can be acceptable, especially for newborns who need regular nourishment. It’s best to gently rouse them when you notice subtle hunger cues.

What is the 3-3-3 rule for baby sleep?

The 3-3-3 rule refers to a pattern some parents use to guide feeding and sleep routines, but it isn’t a medically established guideline. Always follow your baby’s hunger signals and consult your doctor for advice.

What if a newborn is too sleepy to feed?

When a newborn is too sleepy, try gently rousing them with unswaddling and soft touches. If the baby consistently struggles to wake and feed, it’s wise to seek guidance from your pediatrician.

Infant Feeding Amounts Boost Happy Growth

0

Ever wonder if your baby is getting just the right amount of milk to grow strong and happy? This handy guide shows simple, age-based amounts for both breast milk and formula. It trims away the confusion with clear numbers and easy tips.

When you mix these guidelines with your little one’s natural signals, you can feel confident about every feeding. Let this simple chart help you support your baby's growth while making mealtime a calm, joyful part of your day.

Infant Feeding Amounts: Comprehensive Age-Based Milk Intake Chart

img-1.jpg

Feeding your little one is a mix of following some general guidelines and tuning in to your baby's unique cues. This chart is here to help you figure out how much breastmilk or formula your baby might need as they grow. It's a friendly guide for busy parents.

Every baby is different. Watch for signs like lip smacking or a little fuss when they're hungry, and notice when they turn their head away or close their mouth to show they're full. This way, you can blend the guidance of the chart with your baby's own signals really well.

Age Range Amount per Feeding (oz) Feeds per Day Total Daily Intake (oz) Method (Breastmilk/Formula)
Newborn (0–1 month) 1.5–3 8–12 16–24 Breastmilk/Formula
1–2 months 3–4 8–12 24–32 Breastmilk/Formula
3–5 months 4–6 5–6 24–32 Breastmilk/Formula
6–9 months 6–8 4–5 24–32 Breastmilk/Formula
10–11 months 6–8 3–4 20–30 Breastmilk/Formula
12–15 months 3–4 2–3 14–20 Breastmilk/Formula
16–24 months 2–3 2–3 up to 16 Breastmilk/Formula

Think of this chart as a helpful starting point. Always pay attention to your child’s hunger cues, and if you're ever unsure, chat with your pediatrician for advice that fits your family's unique needs.

Breastfeeding Volume Recommendations and Tracking

img-2.jpg

When it comes to feeding your baby, experts say go with the flow and feed on demand, basically, nurse whenever your little one gives you those hunger signals. For example, babies between 3 and 7 months might need to feed eight times or even more in a day. As they grow, you might see about six sessions by 8 or 9 months, and around five by 10 to 11 months. Later on, solid foods start to join the mix, while breastfeeding still happens as needed.

If you’re pumping, keeping an eye on how much milk you collect can be really handy. Generally, babies 3–9 months old drink between 24 and 32 ounces daily. For those a bit older, around 10–11 months, the amount drops a bit to about 20–30 ounces. From 12 to 15 months, you can expect roughly 14–20 ounces each day. And for toddlers between 16 and 24 months, it might be closer to 16 ounces daily.

A simple way to track this is by jotting down a few notes. You could keep a little journal or write on your bottle labels, just note the time, amount, and any cues your baby gives you during feedings. Over a few weeks, these little records can reveal helpful patterns. This makes conversations with your pediatrician a bit easier, helping you understand your baby’s unique needs and making sure you’re both on the same page.

Formula Feeding Schedule and Dosing Guidelines

img-3.jpg

As your baby grows, the amount of formula they drink will naturally increase. Here’s a simple guide to help you plan each feed:

  • Newborn: 2–3 oz per feed, 8–12 feeds a day
  • 1–2 months: 3–4 oz per feed
  • 3–5 months: 4–6 oz per feed
  • 6–9 months: 6–8 oz per feed
  • 10–11 months: 20–30 oz total per day over 3–4 feeds

If your baby finishes their bottle but still seems hungry, maybe by smacking their lips or getting a bit fussy, try adding about ½ oz more. For example, you might say, “I added ½ oz more, and my baby seemed much calmer and more content.”

Remember to always prepare the bottle carefully. Wash your hands, clean each piece of equipment, and keep a simple log of feedings. This way, you have clear guidance on both the feeding amounts and proper formula preparation without repeating other tips.

Recognizing Infant Hunger and Fullness Cues in Feeding

img-4.jpg

Responsive feeding means tuning in to even the quietest hints from your baby. Sometimes it's not just about big signals, you might see tiny shifts in how your little one holds their head or watches a moving light. Maybe they pause for a moment or give a quick blink before continuing, almost as if they’re letting you know they’re experiencing the feed at just the right pace.

Parents, keep an eye on these small details. Perhaps your baby’s grip on the bottle softens or their face shows a change when they lose interest for a moment. When feeding time rolls around, notice if their sucking rhythm slows down or if they take a brief break before getting back to it. These little signs can gently guide you on whether to pause or let things continue naturally.

And when feeding isn’t going as smooth as usual, these subtle cues become even more important. You might see a faint fussiness or a delayed reaction that’s easy to miss if you’re not looking closely. For instance, if your baby’s hand-to-mouth moves start to relax, it could be a soft hint that they’re nearly full and it might be time to slow things down.

Tracking and Adjusting Infant Feeding Amounts

img-5.jpg

Keeping a record of your baby’s feeds can be really helpful to make sure they’re getting enough to grow strong and happy. By writing down feed times, amounts, and little cues from your baby, you can quickly spot changes and adjust as needed.

Calculating Daily and Per-Feed Volumes

A simple trick is to multiply your baby’s weight in pounds by 2.5 oz to get an idea of the total milk for the day. Then, just divide that number by how many times you plan to feed your baby throughout the day. For example, if your baby weighs 10 pounds, that means about 25 oz in total. And if you plan on feeding them 10 times, that comes out to roughly 2.5 oz per feed. Think of it like slicing up a pie into equal pieces, it’s a good guideline that you can adjust as your baby grows and their needs change.

Monitoring Growth and Diaper Output

Keep an eye on how many wet diapers your baby has each day and how their weight is progressing. Seeing six or more wet diapers every day is a reassuring sign that your little one is well hydrated, and steady weight gain means they’re growing just as they should. By watching these details, you can make small adjustments to your baby’s feeding routine every month, ensuring that their intake stays just right for their developmental stage.

Safety Considerations and Professional Guidance for Infant Feeding Volumes

img-6.jpg

These feeding guidelines are a gentle starting point, but remember, every baby is unique. Your little one might need a bit more or less, especially if they were born early or have special health needs. If your baby seems fussy or isn’t putting on weight as expected, it might be a good time to have a chat with your pediatrician to adjust things to suit them better.

When you mix formula, be sure to use the proper scoop and water amounts so the mixture isn’t too strong or too weak. Keeping your formula just right can help prevent feeding problems. And whether you’re storing breastmilk or formula, following the manufacturer’s and CDC’s advice will help keep it safe and fresh.

If you ever worry about your baby’s growth, feeding habits, or if there’s a specific medical issue, don’t hesitate to reach out to your pediatrician. A little extra guidance can go a long way in making sure your baby’s feeding plan is just right for their needs.

Final Words

In the action, we broke down a clear feeding chart outlining age-based recommendations for both breastfeeding and formula feeding. We touched on recognizing hunger cues, tracking milk intake, and safely adjusting our approach to meet each baby’s needs.

This guide offers practical steps for monitoring infant feeding amounts while reminding us that little variations are normal. With these tips in hand, feel reassured to adapt and enjoy each feeding moment with confidence and care.

FAQ

Q: What do infant feeding amounts charts indicate for different ages, including formula milk for baby 0–6 months?

A: Infant feeding charts show milk intake guidelines by age. Newborns typically take 1.5–3 oz per feed, with amounts increasing as they grow. These charts guide routine feeding but should be paired with your baby’s cues and pediatric advice.

Q: What do the 5 3 3 rule for feeding and the 3–3–3 rule for breast milk mean?

A: The 5 3 3 and 3–3–3 rules offer quick guidelines for structuring feeding sessions and milk amounts. They help outline general feeding practices, yet should be adapted based on your baby’s unique hunger and fullness signals.